Topsoil vs Compost: Differences & Uses
When it comes to gardening, the choice between topsoil vs compost is a pivotal decision that can greatly impact the success of your green endeavours.
As a devoted gardening enthusiast, I’ve explored the unique attributes and applications of these two essential components.
In this comprehensive guide, we will delve into the distinctions between topsoil and compost, their respective uses, and why one may be the preferred choice over the other in various gardening scenarios.
In this article, you will gain insights into the world of “Topsoil vs Compost” and learn when and how to utilise these valuable resources to nurture your garden.
Whether you’re levelling uneven terrain, establishing a vibrant lawn, or growing a bountiful vegetable garden, understanding the differences and applications of topsoil and compost is the key to thriving, beautiful plants.
What is Topsoil?
Topsoil is the uppermost layer of soil, typically found in the first few inches to a foot of the Earth’s surface. It’s rich in organic matter and is teeming with a variety of essential nutrients, making it a prime choice for gardeners.
Topsoil is typically extracted from the upper layer of the ground and then screened to remove debris and stones, resulting in a fine, workable soil. This makes it ideal for levelling, filling in holes or depressions, and improving the quality of your garden beds.
Topsoil’s composition consists of a balanced mix of sand, silt, and clay, giving it a loamy texture that’s perfect for most gardening applications.
This blend of particle sizes provides good drainage and aeration while retaining moisture and nutrients, making it an excellent choice for many plants.
Whether you’re starting a new garden bed, patching up bare spots in your lawn, or establishing raised beds and containers, topsoil is often the preferred choice due to its consistency and versatility.
When you’re working with topsoil, it’s essential to consider its pH level, which can vary depending on its source.
A neutral pH of around 6 to 7 is generally suitable for a wide range of plants, but it’s always a good idea to test the pH and amend it if necessary to meet your specific plant requirements.
Additionally, mixing topsoil with compost can enhance its nutrient content and organic matter, offering your plants an even better growing environment. Topsoil is the go-to choice when you need a solid, foundational soil for your gardening projects.
What is Compost?
Compost, often referred to as “black gold” by gardeners, is a nutrient-rich organic material created through the decomposition of organic matter.
This process involves the breakdown of things like kitchen scraps, yard waste, and plant debris by microorganisms, resulting in a dark, crumbly, and humus-rich substance.
Compost is a powerhouse of nutrients, including essential elements like nitrogen, phosphorus, and potassium, along with a host of micronutrients that promote plant health and growth.
One of the most significant advantages of compost is its ability to improve soil structure and fertility. When incorporated into your garden soil, compost helps create a porous, well-aerated environment that retains moisture and allows plant roots to access nutrients and oxygen.
It also enhances the soil’s ability to retain water, which can be a game-changer in regions with erratic rainfall or for drought-prone plants. This ability to hold moisture is especially beneficial in container gardening and raised beds, where regular watering might be more challenging.
Compost’s role in weed suppression is another noteworthy benefit. When used as mulch, it forms a protective layer that inhibits weed growth, reducing the need for labour-intensive weeding.
Additionally, the microorganisms in compost contribute to the overall health of the soil by outcompeting harmful pathogens that can cause plant diseases.
Compost not only nourishes your plants but also helps create a more balanced and resilient ecosystem within your garden.
This environmentally friendly practice also promotes recycling. Instead of sending organic waste to landfills, you can turn it into compost, reducing the overall volume of waste and contributing to a more sustainable garden.
Moreover, using compost in your garden is a fantastic way to reduce the need for chemical fertilisers, thus making your gardening efforts more eco-friendly.
Compost is a remarkable resource for any gardener looking to create a healthy, thriving garden while minimising environmental impact.
Topsoil vs Compost: Key Differences

Now that we’ve delved into the individual characteristics of topsoil and compost, it’s time to examine the key differences between the two.
These distinctions will help you decide when and where to use each one effectively in your garden.
1. Texture and Structure
Topsoil
Topsoil is characterised by its loamy texture, which is the result of a balanced mix of sand, silt, and clay.
This combination offers excellent drainage while retaining moisture and nutrients. Its structure allows for good aeration, making it a versatile choice for various gardening purposes.
Compost
Compost, on the other hand, has a crumbly and loose structure. It’s a lightweight, organic material that’s rich in humus. While compost also provides good aeration, it excels at retaining moisture due to its high organic matter content.
Compost is ideal for improving soil structure and water-holding capacity.
The difference in texture and structure means that topsoil is often used for levelling uneven surfaces, filling holes, and providing a solid foundation for plants.
Compost, on the other hand, is particularly valuable for enhancing soil structure and fertility, making it an excellent choice for amending garden beds and enriching the soil.
2. Nutrient Content
Topsoil
While topsoil contains essential nutrients, its nutrient content can vary depending on its source. It’s generally not as nutrient-rich as compost.
However, it provides a solid foundation for plants and can be enriched by blending it with compost or other organic matter.
Compost
Compost is teeming with nutrients. It’s a valuable source of organic matter, nitrogen, phosphorus, potassium, and micronutrients that are readily available to plants. Using compost can significantly boost soil fertility, promoting healthy growth and robust plants.
The difference in nutrient content means that topsoil may be the preferred choice when you need a neutral and stable base for your garden, while compost is invaluable for enhancing the nutritional profile of your soil.
In some cases, a combination of both may be the best approach to achieve optimal soil quality for your plants.
3. pH Levels
Topsoil
The pH level of topsoil can vary depending on its source and geographic location. It typically falls within the neutral range, around 6 to 7 on the pH scale, which is suitable for a wide range of plants.
However, it’s essential to test the pH of the topsoil you’re working with and amend it if necessary to meet the specific requirements of your plants.
Compost
Compost tends to have a slightly acidic to neutral pH, making it suitable for many plants. However, it’s not a significant factor in deciding whether to use compost since you can easily adjust the pH of your garden soil separately.
The difference in pH levels means that topsoil may require more attention to ensure it meets your plants’ specific pH requirements, while compost’s pH is usually in a range that suits most plants.
Understanding these differences helps you make informed decisions about whether to use topsoil or compost in your garden. It’s often the combination of these factors that determines the best choice for your gardening needs.
When to Use Topsoil
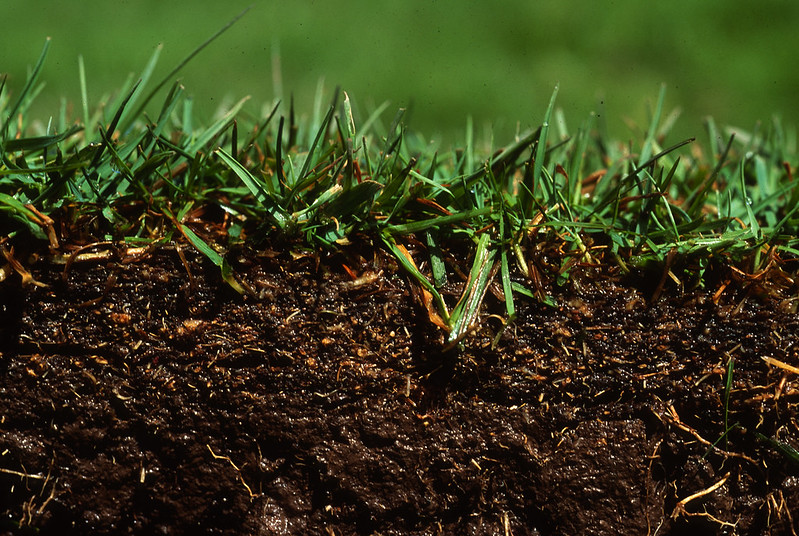
Understanding when to use topsoil is crucial, as it serves as the foundation for various gardening projects.
Filling in Holes and Depressions
Topsoil is the go-to solution when your garden has uneven surfaces, holes, or depressions. Whether due to natural settling, erosion, or other factors, these imperfections can hinder the healthy growth of your plants.
Topsoil, with its consistency and texture, provides an ideal medium for levelling and filling these uneven areas. It ensures that your garden has a smooth and stable surface, preventing water from pooling in low spots and promoting even plant growth.
In this application, you would spread a layer of topsoil over the depressed areas, then level and compact it as needed. This not only addresses the visual aspect but also improves the root environment for your plants.
It’s a practical way to rectify any unsightly and problematic irregularities in your garden.
Lawn Establishment
When it comes to establishing a new lawn or rejuvenating an existing one, topsoil is your trusted companion. A lush and healthy lawn requires a level and well-prepared soil base to allow grass seeds to take root and grow successfully.
Topsoil’s fine texture and balanced composition create an ideal substrate for this purpose.
To use topsoil for lawn establishment, you’d typically spread a layer of it over the area you want to seed or lay sod on. Afterward, you’d rake and level the topsoil to create a smooth surface.
This provides the perfect conditions for grass seeds to germinate and establish healthy roots. Topsoil not only helps with initial growth but also aids in long-term lawn health by providing a fertile and stable foundation.
Raised Beds and Containers
For gardeners who prefer raised beds or container gardening, topsoil is an excellent choice.
Raised beds often require substantial amounts of soil, and topsoil’s composition ensures proper drainage and moisture retention, two key factors for successful raised bed gardening.
Containers, whether large pots or smaller planters, benefit from the use of topsoil as well, especially when paired with regular compost amendments.
Topsoil used in raised beds can be further enriched by incorporating compost or other organic matter.
This blend offers an optimal environment for your plants, giving them the stability they need while still enjoying the benefits of enhanced nutrient content and water retention provided by the compost.
Topsoil’s versatility is evident in these applications, where it serves as the groundwork for plant health and growth, whether in a lawn or within confined spaces like raised beds and containers.
When to Use Compost
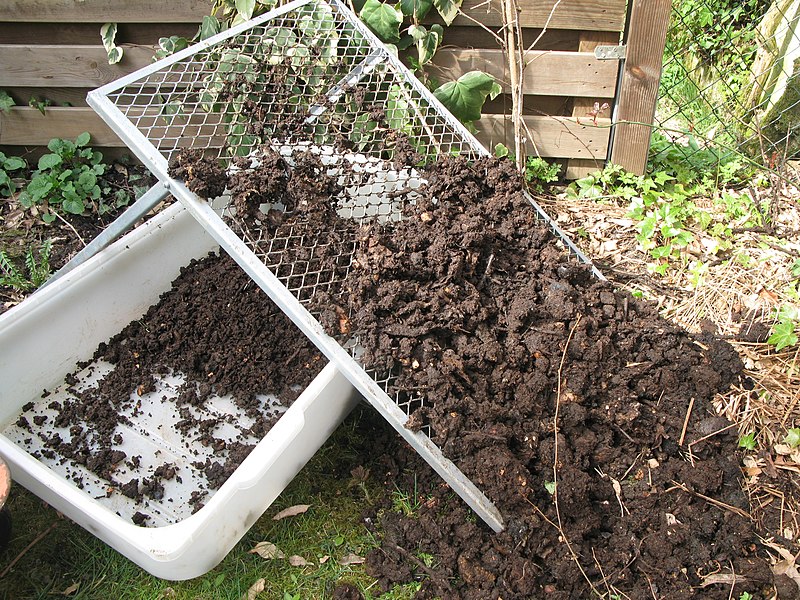
Compost is a gardener’s best friend when it comes to enhancing soil quality and promoting plant growth. Let’s explore specific scenarios where compost takes the spotlight.
Enriching Soil
Compost’s ability to enrich the soil is its hallmark feature. Whether you’re working with garden beds, vegetable patches, or flower borders, incorporating compost significantly boosts soil fertility and structure.
The rich organic matter in compost enhances microbial activity, promoting nutrient cycling and creating a robust, living soil ecosystem.
To enrich your garden soil with compost, spread a layer of it over the surface and work it into the top few inches of soil. This process not only adds essential nutrients but also improves soil structure, making it looser and more crumbly.
Compost helps sandy soils retain more moisture and clay soils drain better, ultimately creating an optimal environment for plant roots.
Mulching and Weed Suppression
Compost is also a valuable tool for mulching, which offers several benefits. When you apply a layer of compost around the base of your plants, it acts as a protective barrier that retains soil moisture, regulates soil temperature, and reduces weed growth.
This natural mulch helps your garden maintain a consistent moisture level, especially during hot summer months or dry spells.
The suppression of weeds is an added advantage of compost mulch. By blocking sunlight and providing a physical barrier, compost makes it challenging for weed seeds to germinate and establish.
This means less time spent weeding and more time enjoying your garden.
Organic Matter Recycling
Composting is a sustainable practice that recycles organic matter from your kitchen and garden waste. Instead of sending organic materials to landfills, you can turn them into nutrient-rich compost.
This not only reduces waste but also supports environmental sustainability.
Creating your compost at home is a cost-effective way to recycle organic matter. There are various methods for composting, including traditional compost bins and worm composting (vermicomposting).
These methods allow you to transform kitchen scraps, leaves, grass clippings, and other organic materials into compost that you can use to improve your garden’s soil health.
Compost’s role in recycling organic matter has broader implications for sustainability, as it reduces the demand for chemical fertilisers and helps create a closed-loop system in your garden.
These scenarios highlight the versatility and environmental benefits of using compost in your garden. Whether you’re looking to enrich soil, suppress weeds, or contribute to sustainable practices, compost plays a pivotal role in promoting a thriving garden ecosystem.
The Perfect Blend: Mixing Topsoil and Compost
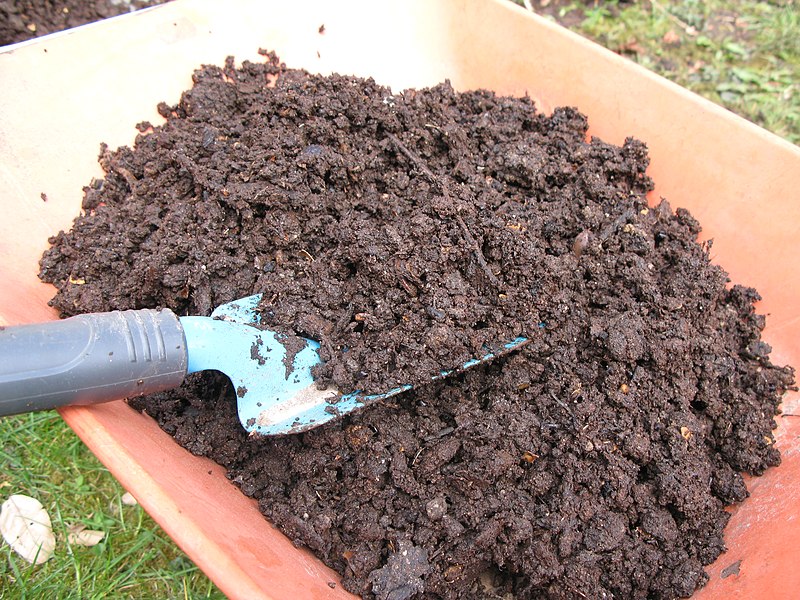
In many gardening situations, a combination of both topsoil and compost can provide the best of both worlds.
The process of creating a custom soil mix allows you to tailor the soil to the specific needs of your plants and garden projects.
Making Garden Soil Mix
Creating your custom garden soil mix involves blending topsoil and compost in varying proportions based on your requirements.
This custom mix can provide the advantages of both topsoil and compost, resulting in a fertile, well-draining, and moisture-retaining soil that’s perfect for many different plants.
The typical ratio for a garden soil mix is approximately one part topsoil to one part compost. This balance maintains the desirable texture and structure of topsoil while infusing the soil with the nutrient-rich and moisture-retentive properties of compost.
However, the specific ratio can vary depending on the plant’s needs, your local climate, and other factors.
To create your garden soil mix, spread both the topsoil and compost over your garden bed or container and use a rake or tiller to incorporate the materials thoroughly.
The goal is to achieve an even distribution, ensuring that the resulting mix supports plant growth and health.
The Benefits of Blending
The combination of topsoil and compost offers a range of benefits:
- Nutrient-rich: The compost component provides a wealth of nutrients that your plants can access, promoting healthy growth.
- Improved soil structure: The addition of compost enhances the soil’s structure, making it looser, more crumbly, and better for root penetration.
- Water retention: Compost’s ability to hold moisture complements topsoil’s drainage properties, ensuring a balanced moisture level for your plants.
- Organic matter content: The blend increases the organic matter content of your soil, contributing to a thriving soil ecosystem.
- Enhanced microbe activity: The microbes from compost contribute to nutrient cycling, benefiting plant health.
Considerations for Your Blend
When creating your garden soil mix, consider the specific requirements of your plants. Some plants prefer a well-drained soil, while others thrive in moisture-retentive conditions.
Understanding the needs of your garden will help you adjust the proportions of topsoil and compost accordingly.
Additionally, always test your garden soil’s pH and amend it as needed to match the requirements of your plants.
The pH adjustment can be performed either by adding specific amendments or by blending topsoil with naturally acidic or alkaline compost to achieve the desired pH range.
Remember that the perfect blend is not a one-size-fits-all solution but a customisable approach to tailor your soil to the unique needs of your garden.
Topsoil vs Compost Frequently Asked Questions
Can I use topsoil and compost together in my garden?
Absolutely! Mixing topsoil and compost can provide a balanced and nutrient-rich environment for your plants.
Is compost suitable for all types of plants?
Compost is generally beneficial for most plants, but it’s especially advantageous for vegetables, flowers, and herbs.
How do I know if my garden needs topsoil or compost?
Assess your garden’s current soil quality and the specific needs of the plants you want to grow. Topsoil is great for levelling and filling, while compost improves soil structure and nutrient content.
Can I make my compost at home?
Certainly! Home composting is an eco-friendly way to recycle kitchen and garden waste. There are numerous resources and guides available to help you get started.
Are there any alternatives to topsoil and compost for gardening?
While topsoil and compost are common choices, other options like peat moss, perlite, and vermiculite can also be beneficial for certain gardening purposes.
Topsoil vs Compost Conclusion
In the dynamic realm of gardening, the choice between “Topsoil vs Compost” isn’t a matter of one being superior to the other. It’s about knowing when to wield the right tool for the job.
Topsoil, with its stable foundation, is excellent for levelling, filling, and providing a consistent surface for your plants. Compost, on the other hand, enriches the soil, fosters healthy growth, and champions sustainable practices.
In your journey as a gardener, the versatility of both topsoil and compost will be your allies, allowing you to cater to the unique needs of your garden. Your intuition and experience as a gardener will guide you towards the best choice for your green oasis.
Whether it’s topsoil, compost, or a harmonious blend of both, your garden will flourish under your dedicated care.
So, with the knowledge of “Topsoil vs Compost” in your toolkit, go forth and create a garden that flourishes and thrives. Happy gardening!
How To Remove Mushrooms Off Your Lawn
Mushrooms on lawn causing you frustration and compromising the beauty of your outdoor space? You’re not alone.
Many homeowners grapple with this issue. In this detailed guide on how to get rid of mushrooms on your lawn, we’ll explore effective strategies to tackle this problem head-on.
From identifying the types of mushrooms to understanding the reasons behind their appearance, we’ll leave no stone unturned.
You’ll learn about natural removal methods, chemical control options, and proactive measures to maintain a lush, mushroom-free lawn.
Whether you’re a gardening enthusiast or a homeowner seeking solutions, this guide is your roadmap to a picture-perfect lawn without the intrusion of those unwanted fungi.
Let’s embark on this journey to reclaim your lawn’s pristine allure. Discover the insights and techniques you need to create a mushroom-free haven right in your own garden.
Understanding the Mushroom Problem
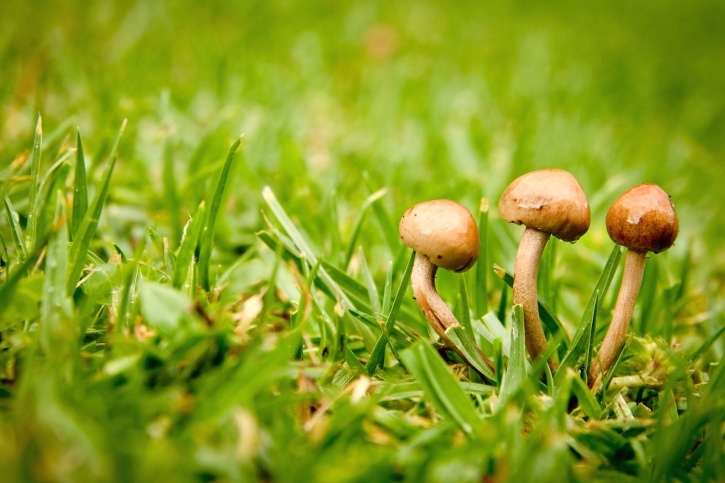
Identifying Lawn Mushroom Types
Before we delve into the removal process, it’s essential to identify the types of mushrooms in your lawn.
Not all mushrooms are harmful, and some can even be beneficial. Let’s discuss common varieties and how to differentiate them.
When it comes to lawn mushrooms, there are three primary categories you should be aware of:
1. Saprophytic Mushrooms: These mushrooms feed on decaying organic matter in your soil. While they may not directly harm your lawn, they can be unsightly. Common examples include the classic white button mushroom and the ink cap.
2. Mycorrhizal Mushrooms: These mushrooms form beneficial relationships with certain trees and shrubs. They can actually enhance your lawn’s health by aiding in nutrient absorption. Examples include the beautiful fly agaric and the chanterelle.
3. Parasitic Mushrooms: Parasitic mushrooms, like the lawn blister fungus, can be detrimental to your grass. They directly attack living plants and should be dealt with promptly.
To accurately identify these mushrooms, consider consulting with a local horticultural expert or using field guides specific to your region.
Why Mushrooms Appear on Lawns
Understanding the root causes of mushroom growth is crucial to effective removal.
Several factors contribute to their presence, and addressing these factors is key to keeping your lawn mushroom-free.
1. Moisture Levels: Mushrooms thrive in moist environments. Lawns that are overwatered or have poor drainage are more susceptible to mushroom growth. To combat this, ensure you’re watering your lawn correctly and addressing drainage issues.
2. Soil Composition: Certain soil types are more conducive to mushroom growth. Mushrooms love rich, organic soils. If your lawn soil is too rich in organic matter, consider amending it with sand or other materials to reduce fungal habitat.
3. Organic Matter: Mushrooms feed on decaying organic matter, such as thatch and dead tree roots. Regular dethatching and removal of organic debris can reduce mushroom growth opportunities.
Prevention is Key
Adjusting Lawn Watering Practices
Proper watering techniques are paramount to preventing mushroom growth. Many homeowners inadvertently create the ideal environment for mushrooms by watering too frequently or at the wrong times.
To prevent overwatering, consider these tips:
- Water Deeply and Infrequently: Instead of frequent shallow watering, aim for deep, less frequent watering sessions. This encourages deeper root growth and discourages surface fungi.
- Water in the Morning: Watering in the morning allows the grass to dry throughout the day, reducing moisture levels in the evening when fungi are most active.
- Invest in a Sprinkler System: A properly calibrated sprinkler system can help ensure consistent and efficient watering practices.
By adjusting your watering habits, you can significantly reduce the risk of mushroom growth in your lawn.
Improve Lawn Drainage
Inadequate drainage is a common contributor to mushroom problems. When your lawn retains excess water, it creates an ideal habitat for fungi to flourish.
Here’s how to improve lawn drainage:
- Aerate Your Lawn: Aerating your lawn helps water penetrate deeper into the soil and reduces surface runoff.
- Install Drainage Solutions: Consider installing French drains or other drainage systems in areas prone to pooling water.
- Raise Low Spots: If you have low-lying areas in your lawn, raise them to promote better water runoff.
Proper drainage not only prevents mushrooms but also contributes to a healthier lawn overall.
Reduce Organic Matter
Mushrooms thrive on decaying organic matter, so reducing their food source can be highly effective in preventing their growth.
Here’s how to reduce organic matter:
- Dethatch Your Lawn: Thatch is a layer of dead grass and organic material that can accumulate on your lawn. Use a dethatching rake or machine to remove it.
- Remove Dead Tree Roots: If you have dead tree roots in your lawn, they can serve as a breeding ground for mushrooms. Remove them if possible.
- Rake Up Leaves: Keep your lawn clear of fallen leaves in the fall, as they can become a source of organic matter for mushrooms. By reducing organic matter, you’ll create an environment that’s less hospitable to mushrooms.
Mushrooms on Lawn Natural Removal Methods

Manual Removal
Sometimes, the best way to deal with mushrooms is to get your hands dirty. Manual removal involves physically plucking the mushrooms from your lawn. While it may seem time-consuming, it can be an effective method, especially for small infestations.
To manually remove mushrooms:
- Wear Gloves: Some mushrooms can be toxic or irritating to the skin, so it’s essential to wear gloves when handling them.
- Use a Trowel: A small garden trowel or mushroom knife can be handy for carefully digging out mushrooms, ensuring you remove the entire structure, including the underground mycelium.
- Dispose Properly: After removal, dispose of the mushrooms in a sealed bag or container. Do not compost them, as this can reintroduce spores to your lawn.
- Monitor for Regrowth: Keep an eye on your lawn for any signs of mushroom regrowth and repeat the process as necessary.
Promoting Natural Predators
Nature has its own way of dealing with mushroom growth. Some creatures, such as slugs, snails, and certain insects, feed on mushrooms. By encouraging these natural predators in your lawn, you can help control mushroom populations.
To promote natural predators:
- Create Biodiversity: A diverse lawn ecosystem with a variety of plant species attracts different insects and animals that can help keep mushrooms in check.
- Avoid Chemicals: Pesticides and fungicides can harm these natural predators. Minimise chemical use in your lawn to protect them.
- Provide Shelter: Create habitats like rock piles or log piles where predators can find shelter and make your lawn their home.
Chemical Control Options
Fungicides
For more severe mushroom infestations, you may consider using fungicides as a last resort. Fungicides are chemical compounds formulated to control fungal growth. However, it’s essential to use them responsibly and selectively, as they can have environmental consequences.
- Consult an Expert: Before using fungicides, it’s wise to consult with a local gardening expert or extension service to identify the specific fungus and choose the appropriate fungicide.
- Follow Label Instructions: Always follow the manufacturer’s instructions for application, safety precautions, and disposal of chemicals.
- Limit Use: Use fungicides sparingly and only in the affected areas to minimise their impact on beneficial organisms.
Professional Help
If you’ve tried various methods and the mushroom problem persists or worsens, it may be time to seek professional assistance. Landscaping and lawn care experts have the knowledge and tools to tackle persistent mushroom issues effectively.
When considering professional help:
- Research Local Experts: Look for reputable local landscapers or lawn care services with experience in fungus control.
- Ask for Recommendations: Seek recommendations from friends, neighbours, or gardening communities to find trusted professionals.
- Get Multiple Quotes: Collect quotes from different experts to compare prices and services before making a decision.
Maintaining a Mushroom-Free Lawn

Regular Lawn Care Practices
Prevention and maintenance go hand in hand. Once you’ve rid your lawn of mushrooms, it’s crucial to maintain healthy practices to prevent their return.
- Mow Properly: Regular mowing at the appropriate height for your grass type helps maintain good air circulation and reduces moisture build-up.
- Fertilise Wisely: Avoid excessive nitrogen-rich fertilisers that can encourage fungal growth. Use balanced, slow-release fertilisers instead.
- Overseed as Needed: Patchy or thin lawns are more susceptible to mushrooms. Overseed to keep your lawn thick and resilient.
Vigilance and Consistency
Consistent monitoring and quick action are essential in keeping mushrooms at bay. Make it a routine to inspect your lawn for any signs of fungal growth. Remember that prevention is often more straightforward than cure.
- Regularly Inspect: Walk your lawn regularly, especially during wet seasons, to catch early signs of mushroom growth.
- Prompt Removal: If you spot mushrooms, remove them immediately using manual methods discussed earlier.
- Adjust Lawn Care: Modify your lawn care practices as needed based on the specific conditions of your lawn and local climate.
Mushrooms on Lawn FAQs
Q1: Are all mushrooms harmful to my lawn?
Not all mushrooms are harmful. Some are actually beneficial to your lawn’s health. It’s essential to identify the types before deciding to remove them. Refer to the “Identifying Lawn Mushroom Types” section for more details.
Q2: How often should I water my lawn to prevent mushroom growth?
The frequency of watering depends on various factors like climate and soil type. Generally, aim for deep, infrequent watering rather than frequent shallow watering to discourage mushrooms. For detailed guidance, see the “Adjusting Lawn Watering Practices” section.
Q3: Can I use household products like vinegar to get rid of mushrooms?
While vinegar is a popular DIY remedy, it’s essential to use it cautiously, as it can affect your lawn’s pH balance. It’s better to explore other natural removal methods first. For alternatives, see the “Natural Removal Methods” section.
Q4: What’s the best time of year to tackle mushroom removal?
Fall and spring are ideal seasons for addressing mushroom issues. The moderate temperatures and moisture levels make these times conducive for lawn care. For more information, see the “Maintaining a Mushroom-Free Lawn” section.
Q5: Are fungicides safe for pets and children?
It’s crucial to follow the manufacturer’s instructions and keep pets and children off treated areas until they are deemed safe. Consider safer alternatives if you have concerns about chemical use around your loved ones. For detailed guidance, refer to the “Fungicides” section.
Mushrooms on Lawn Conclusion
In closing, our exploration of mushrooms on lawn and the effective methods to address them has equipped you with the expertise needed to transform your outdoor space.
By understanding the various types of mushrooms, deciphering the factors leading to their appearance, and implementing proven removal techniques, you now possess the tools to create the immaculate, mushroom-free lawn you’ve envisioned.
Maintaining a beautiful lawn extends beyond aesthetics; it’s about cultivating an inviting outdoor retreat for yourself and your loved ones.
With the strategies outlined in this guide, you are fully prepared to restore your lawn’s natural allure.
Now, take action with confidence, bid farewell to unwanted mushrooms, and embrace the journey towards a captivating, mushroom-free lawn.
Your vision of a pristine outdoor space is not only attainable but also well within your grasp. Enjoy the rewards of a garden that’s free from mushrooms, where beauty and tranquility reign supreme.
Mastering Daisy Control: Your Ultimate Guide to a Flawless Lawn
The daisy, an innocent, charming, yet a relentless invader of your meticulously nurtured turf.
We’re diving headfirst into the intriguing conundrum of daisies invading our prized lawns. They’re like uninvited guests to a garden party, and we’re here to address this floral fracas.
We’ve unearthed potent strategies to wrestle back control from the daisy’s grasp. From precision mowing techniques to smart irrigation methods that keep your grass content and daisies at bay, we’re wielding a toolkit brimming with savvy solutions.
It’s time to roll up those sleeves, equip ourselves with knowledge, and bid those daisies a polite yet firm farewell.
Welcome to the ultimate guide to mastering common daisy lawn control and prevention. Let’s dive right in.
Getting to Know Daisies
The Daisy Dilemma: Identifying Common Daisies
A seemingly delicate delight that belies the complexities it introduces to our flourishing landscapes. Before we plunge into the intricacies of management and defence, let’s identify he various types of daisy.
- Bellis Perennis – The Resilient English Daisy Cast your gaze upon Bellis perennis, the English Daisy. Its diminutive size and vibrant petals – a symphony of whites and pinks – may win you over, but make no mistake, it’s a persistent perennial with an unwavering mission to dot your lawns with its presence.
- Leucanthemum Vulgare – The Quintessential Oxeye Daisy In steps Leucanthemum vulgare, the Oxeye Daisy, adorning the fields with its classic charm. The hallmark golden centre encircled by pristine white petals – a true emblem of the countryside. Yet, within your meticulously curated turf, it transforms into a tenacious adversary.
- Tripleurospermum Inodorum – The Deceptive Scentless Mayweed Ah, the Tripleurospermum inodorum, or the Scentless Mayweed, stands as the master of disguise. Often masquerading as a daisy, its white petals and sunny disposition give it away. However, beneath the surface, it’s an imposter worthy of attention.
- Glebionis Segetum – The Intriguing Corn Marigold Glebionis segetum, better known as the Corn Marigold, boasts sunny yellow blossoms that thrive in open fields. Yet, should it venture into your meticulously nurtured lawn, its once-pleasant presence transforms into a head-scratching predicament.
- Erigeron Annuus – The Showy Fleabane Finally, we encounter Erigeron annuus, the Showy Fleabane. With petals of pale purple surrounding a sunny core, it can indeed steal the spotlight. However, as a participant in your turf tapestry, it takes on a role you’d rather not assign.
Common Daisy Lawn Invasion

Understanding the Impact of Daisies on Your Lawn Ecosystem
Daisies, those charming botanical inhabitants, may appear as mere embellishments on your lawn’s canvas, but their influence runs deeper than their petals suggest.
As these resilient invaders stake their claim, they trigger a series of domino effects that reverberate across your carefully cultivated ecosystem.
1. Root Rivals and Below-Ground Brawls: Beneath the surface, a subterranean turf warfare emerges. Daisies vie for essential nutrients and moisture, casting a shadow over the grassroots of your beloved grass varieties. It’s a battle for survival, where the underdogs are not necessarily your grasses.
2. Biodiversity in Flux: The arrival of daisies often tips the scales, altering the intricate biodiversity of your lawn. While daisies bring their own unique charm, they can inadvertently edge out native plants and disrupt the harmonious balance that supports various insects, birds, and microorganisms.
3. The Water-Weed Conundrum: Picture this – your diligent irrigation efforts nurturing both grass and daisies alike. But hold on! Daisies have different water requirements, potentially outcompeting your grasses and leading to uneven growth. The result? A waterlogged war zone, where some thrive while others struggle.
4. Sunlight Scramble: Daisies, with their sun-loving disposition, may snag more than their fair share of sunlight, casting prolonged shadows that can challenge the photosynthesis prowess of your grasses. The result? An uneven distribution of sunlight and, consequently, a patchwork of growth patterns.
5. Wildlife Whims: Wildlife enthusiasts, beware. Daisies can be magnets for certain pollinators, diverting their attention from your grasses’ own floral offerings. While supporting pollinators is crucial, an imbalance may disrupt the pollination dynamic you’ve carefully nurtured.
When Do Daisies Appear?
These delightful flowers, often celebrated for their simplicity, follow a captivating rhythm in their appearance.
So, let’s dive right in and explore the timing and reasons behind the enchanting daisy displays gracing our lawns.
Spring’s Delightful Surprise: As winter relinquishes its hold, daisies seize the opportunity to make their entrance. Spring, with its gradual warming and rejuvenation, sets the stage for the first glimpses of these blooms. Watch for them as temperatures begin to climb, signalling the renewal of life after the colder months.
Summertime Blossoms: The sunny days of summer – a time when daisies truly shine. These floral stars dot our landscapes with their cheerful presence. As the sun extends its stay and the weather warms, daisies burst forth in a riot of colours, creating a picturesque scene that embodies the essence of the season.
Autumn’s Last Hoorah: Just when you thought their show was over, daisies return for an encore as autumn paints the world with its golden hues. These resilient blooms continue to grace our lawns even as temperatures begin to dip. It’s a reminder that nature’s beauty knows no bounds, even as we transition to cooler days.
But what orchestrates this botanical calendar? It’s a symphony of factors, from daylight duration to temperature shifts and microclimates specific to your area.
Control Strategies and Prevention Techniques

Manual Removal of Daisies
It’s time to tackle those persistent floral invaders head-on, armed with methods that put you firmly in control.
Method 1: Hand Pulling
Step into the role of the vigilant gardener as you embark on the age-old dance of hand pulling.
Armed with a trusty pair of gloves, grasp the daisies near the base and gently rock them back and forth, coaxing them from their grassroots grip.
While it’s a labour-intensive endeavour, it offers a direct and satisfying way to restore your lawn’s equilibrium.
Pros:
- Direct Removal: Hand pulling offers immediate and targeted removal of daisies.
- Low Cost: Requires minimal equipment and expense.
- Satisfying: Provides a hands-on approach for a sense of accomplishment.
Cons:
- Labour-Intensive: Can be time-consuming and physically demanding, especially for larger infestations.
- Incomplete Removal: May leave behind broken roots, allowing daisies to regrow.
Method 2: Dethatching
Unleash the power of dethatching to show those daisies who’s boss.
Using a dethatching rake, carefully comb through your lawn, targeting areas where daisies have set their roots.
This method not only tackles daisies but also breathes new life into your grass by allowing it to breathe and grow more vigorously.
Pros:
- Overall Lawn Health: Dethatching benefits the entire lawn by improving aeration and nutrient absorption.
- Selective Removal: Targets not only daisies but also other unwanted thatch.
- Promotes Growth: Encourages healthy grass regrowth after daisy removal.
Cons:
- Equipment Needed: Requires a dethatching rake or machine, which may be an added expense.
- Skill Required: Proper technique is essential to avoid damaging the grass.
Method 3: Trowel
For those who relish precision, the trusty trowel becomes your ally.
With surgical precision, dig around the daisy clumps, easing them out along with their tenacious roots.
It’s a meticulous approach that ensures minimal disruption to surrounding grass and sets the stage for your lawn’s triumphant comeback.
Pros:
- Precision: Trowel removal allows careful extraction of daisies without disturbing surrounding grass.
- Minimal Disruption: Preserves the overall aesthetics of your lawn.
- Root Removal: Ensures complete eradication of daisies and their roots.
Cons:
- Time-Consuming: Trowel removal can be slow and meticulous, especially for larger areas.
- Labour-Intensive: Requires bending and digging, potentially straining your back and muscles.
Method 4: Aerator
Enter the aerator – a heavy-duty tool that not only alleviates soil compaction but also gives daisies a one-way ticket out of your turf.
As the aerator’s hollow tines penetrate the earth, they create pathways for daisy removal, leaving behind aeration channels that benefit your grass.
Pros:
- Dual Benefits: Aeration not only removes daisies but also improves soil compaction and drainage.
- Time-Efficient: Aerator covers larger areas quickly.
- Prevents Regrowth: Aeration disrupts daisy roots and reduces chances of regrowth.
Cons:
- Equipment Needed: Requires an aerator machine, which might not be readily available.
- Surface Disruption: May temporarily leave holes or plugs on your lawn’s surface.
Method 5: The Sod Cutter Solution
In cases of widespread daisy infestations, the sod cutter takes centre stage.
This powerful implement slices through the turf, enabling you to lift and remove sections affected by daisies.
While it’s a more drastic measure, it’s a decisive way to reset your lawn’s canvas for a fresh start.
Pros:
- Complete Removal: Sod cutter provides a thorough and comprehensive removal of daisies and affected turf.
- Fresh Start: Allows for reseeding or replanting with new grass varieties.
- Efficiency: Ideal for extensive infestations or lawn renovations.
Cons:
- Invasive: Sod cutter removes a significant portion of your lawn, resulting in disruption.
- Labour and Equipment: Requires physical effort and access to a sod cutter machine.
- Grass Regrowth: Reseeding or replanting may be needed after removal.
Each of these manual methods comes with its own set of nuances and benefits, allowing you to tailor your approach to your lawn’s unique needs.
Remember, the key lies in persistence and precision.
By employing these methods, you take back control, one daisy at a time, transforming your lawn into a haven that flourishes under your watchful eye.
Chemical Chronicles: Herbicides and Their Role in Daisy Control
We’re delving into the intriguing world of herbicides and uncovering their pivotal role in restoring harmony to our emerald landscapes.
Understanding Herbicides: A Brief Prelude
Before we dive headlong into the specifics, let’s demystify herbicides.
These chemical warriors are meticulously formulated to target and eliminate undesirable vegetation, daisies included.
Now, let’s unfurl the scroll of knowledge and examine the dual-edged sword of herbicides in the quest for daisy control.
Selective Herbicides: The Daisy Whisperers
Enter the realm of selective herbicides – those ingenious concoctions that have mastered the art of discrimination.
These herbicides have an uncanny ability to differentiate between daisies and your cherished grass varieties.
With precision that would make a surgeon envious, they take out the daisies while sparing your grass, maintaining the integrity of your lawn’s aesthetic.
Pros:
- Precision Strike: Selective herbicides target daisies without harming surrounding grass.
- Ease of Use: Application is straightforward, making it accessible to DIY enthusiasts.
- Controlled Impact: Minimal disruption to the overall lawn ecosystem.
Cons:
- Specificity: Some selective herbicides may not effectively combat all daisy species.
- Persistence: Resistant daisies may require repeated applications.
- Environmental Considerations: Proper application is crucial to prevent runoff and non-target impacts.
Non-Selective Herbicides: A Swift Eradication
For those facing widespread daisy infestations, non-selective herbicides emerge as the heavy artillery.
These potent solutions aren’t picky – they eliminate any vegetation they come in contact with, daisies included.
While a more drastic measure, they pave the way for a clean slate, ready for lawn rejuvenation.
Pros:
- Comprehensive Removal: Non-selective herbicides eradicate daisies and other unwanted plants.
- Speedy Action: Rapid results with minimal effort.
- Blank Canvas: Provides a fresh start for reseeding or replanting.
Cons:
- Unintended Consequences: Non-selective herbicides can harm beneficial plants and soil organisms.
- Temporary Disruption: Requires time for affected areas to recover and new growth to establish.
- Precision Required: Careful application is essential to avoid damaging desirable plants.
Before embarking on the chemical crusade, it’s imperative to assess your lawn’s unique needs, as well as your comfort level with herbicide use.
Remember, whether you opt for selective finesse or non-selective vigour, herbicides are tools to be wielded with care and consideration.
Lawn Management Practices to Outshine Daisies

1. The Right Blade Height and Frequency
Think of your lawn as a living tapestry, and the blade height as the delicate balance between art and science.
The sweet spot lies around 2.5 to 3 inches (6.4 to 7.6 cm) – not too tall, not too short.
This height casts a gentle shade on daisies, curbing their sunlight supply without stressing your grass.
It’s a harmony that lets your lawn thrive while discouraging those persistent daisy invaders.
Now, let’s talk about the rhythm of mowing frequency. A consistent schedule is the conductor that orchestrates the symphony of your lawn’s aesthetics.
During active growth periods, aim to mow every 1 to 2 weeks.
By mastering the art of blade height and mowing frequency, you’re sculpting a lawn that defies daisy domination.
2. Watering Wisely to Thwart Daisies
Finding the equilibrium is key. Aim for a deep soak that reaches the root zone, about 6 to 8 inches (15 to 20 cm) beneath the surface.
This ensures your grass gets the hydration it craves, while leaving daisies parched and discouraged.
The morning hours, just before the sun stretches its rays, are your prime window for watering.
This early serenade allows your grass to drink deeply and dry off before evening, reducing the risk of prolonged moisture that can invite daisies and other unwanted guests.
Let’s debunk a common myth – shallow sips aren’t the solution. Frequent, light watering may seem nurturing, but it actually promotes shallow root growth, leaving your grass vulnerable.
Instead, opt for less frequent but deep watering sessions. This encourages your grass to reach down for water, growing stronger and more resilient against daisies’ advances.
Equip yourself with the tools of precision – a rain gauge or a trusty trowel – to gauge moisture levels accurately.
Before reaching for the sprinklers, ensure your lawn truly thirsts for it. Overwatering is not only wasteful but also counterproductive, potentially fostering daisy growth in waterlogged areas.
3. Fertilisation for a Daisy-Resistant Lawn
Imagine your lawn as a living entity, craving sustenance to thrive. Fertilisation is the conductor’s baton, directing a harmonious blend of essential nutrients to nurture your grass.
Nitrogen, phosphorus, and potassium take the lead, each playing a crucial role in fortifying your lawn’s resilience and fostering a robust root system that daisies can’t penetrate.
Spring and fall take centre stage as the prime seasons for fertilisation.
Spring awakening primes your grass for a vibrant growth spurt, while fall provides a final nourishing curtain call before winter’s slumber.
By aligning your fertilisation routine with nature’s cues, you’re setting the stage for daisy-resistant success.
Now, let’s talk dosage. It’s tempting to shower your lawn with excess nutrients, but beware the consequences.
Over-fertilisation not only fuels daisies’ growth but also disrupts the ecological equilibrium of your lawn.
Opt for a controlled approach, following recommended application rates and employing slow-release fertilisers that sustain your grass over time.
Embrace the symphony of organic fertilisers – nature’s own composition of nourishment.
Compost, manure, and other organic amendments enrich your soil and encourage a thriving microbial community beneath the surface.
It’s a holistic approach that not only fortifies your grass but also enhances the overall health of your lawn ecosystem, creating a hostile environment for daisies.
Going Natural: Eco-Friendly Approaches
Natural Alternatives to Combat Daisies
1. Hot Water Blitz
Picture this: a daisy-killing spa day, but for your lawn. Boiling water emerges as a formidable contender in the daisy combat arena. By pouring scalding water over daisy clusters, you’re delivering a heat shock that spells doom for these floral foes. It’s an eco-friendly option that’s as satisfying as it is effective.
2. Vinegar Victory
Enter vinegar – that household staple with a secret talent for daisy destruction. Its acetic acid prowess takes centre stage, wilting daisies and thwarting their growth. Mix vinegar with water, load it into a spray bottle, and embark on your eco-friendly mission to banish daisies.
Remember, though, that vinegar’s acidic nature can affect surrounding plants, so strategic application is key.
3. Boiling Baking Soda Blast
Baking soda, the humble kitchen ingredient, becomes a potent ally in your eco-friendly arsenal. Create a boiling baking soda solution, douse those daisies, and watch as the alkaline onslaught disrupts their equilibrium. It’s a chemical-free approach that sings harmony with the environment while sending daisies packing.
4. Corn Gluten
Ah, corn gluten – nature’s secret weapon against daisies. This organic by-product of corn processing emerges as a pre-emergent herbicide, disrupting daisy seeds’ quest for growth. Sprinkle it across your lawn, and let the corn gluten work its magic, stifling daisies’ ambitions and leaving your grass unscathed.
5. Sunlight Starvation
Embrace the power of darkness to thwart daisies’ dreams of sunlight. Cover daisy-infested areas with cardboard or black plastic, effectively denying them access to the life-giving rays. Over time, this natural light deprivation weakens daisies and paves the way for a grassy resurgence.
Harnessing Mulching to Suppress Daisy Growth
Mulching is nature’s solution to an array of gardening challenges. As we delve into its application, you’ll discover how mulching transcends mere aesthetics, becoming a powerful tool in your arsenal.
Introducing Daisy-Fighting Plants to Your Lawn
Strategic Suppression: Mulching vs. Daisies
Let’s get down to business – how does mulching deter daisies? By creating a physical barrier, mulch obstructs sunlight from reaching daisy seeds, effectively impeding their germination and growth. It’s a natural defence mechanism that plays to your advantage, disrupting daisies’ attempts to take centre stage in your lawn.
Mulch Materials: Unveiling the Choices
Now, let’s explore the diverse cast of characters that compose the mulching ensemble. Organic mulches, such as wood chips, straw, and shredded leaves, not only suppress daisies but also enrich your soil as they decompose. Meanwhile, inorganic mulches like gravel and stones provide a more permanent shield against daisies’ advances.
Mulching Method: The Grand Application
Prepare for a mulching spectacle! Apply a layer of mulch, about 2 to 4 inches (5 to 10 cm) deep, across the soil’s surface, ensuring it covers daisy-prone areas. Keep a comfortable distance from your grass stems to prevent moisture build-up and potential disease.
Remember, moderation is the mantra, as excessive mulching can lead to suffocated soil and unhappy roots.
Mulching Marvels: Beyond Daisy Suppression
The wonders of mulching extend far beyond daisy control. Mulch acts as a moisture regulator, reducing water evaporation and keeping your soil hydrated – a crucial factor in maintaining a lush and resilient lawn. It also helps insulate your grass’ root zone, providing a buffer against temperature extremes.
Creating a Daisy-Tolerant Lawn
Incorporating Flower Beds and Borders
The Flower Bed Symphony: A Dance of Diversity
Imagine a canvas alive with a symphony of colours, textures, and fragrances. Flower beds are the composers of this visual delight, offering a stage for daisies to shine alongside other captivating blooms. By integrating daisies within designated flower beds, you’re channelling their growth while celebrating their charm.
Strategic Positioning: Daisy Zones and Floral Frontiers
Let’s strategise – envision your lawn as a tactical battlefield, with flower beds serving as your allies. Position these beds strategically, bordering your lawn’s periphery or nestled within. By segregating daisies to these designated zones, you’re creating an equilibrium where they coexist without overpowering your pristine turf.
Companion Planting Choreography: Daisies and Allies
Daisies, like charismatic partners, thrive when paired with certain allies. Consider interplanting daisies with taller perennials or ornamental grasses that lend shade and competition. These companions not only add dimension to your flower beds but also outcompete daisies, preventing them from monopolising precious resources.
Edging Elegance: Borders as Guardians
Enter the guardians of your daisy-tolerant realm – borders. These defined edges create a visual boundary between your lawn and flower beds, asserting the territories of each. Mulch or decorative stones form the frontline, discouraging daisies from infiltrating your meticulously crafted floral oases.
Maintenance Mastery: Nurturing the Equilibrium
Nurturing your daisy-tolerant haven demands a symphony of care. Regular maintenance includes deadheading spent daisy blossoms, preventing seed dispersal, and monitoring for any signs of daisy encroachment. With diligence, your flower beds and borders will flourish, showcasing a blend of daisy allure and floral enchantment.
A Controlled Integration for Aesthetic Appeal
Strategic Placement: Daisies as Focal Points
Let’s set the stage – envision daisies as the focal points of your lawn’s grand tapestry. By intentionally placing daisy clusters in well-defined areas, you’re allowing their wild beauty to shine without overwhelming the landscape.
Think corners, edges, or even islands within your turf – these become the canvas for your controlled integration masterpiece.
Varietal Brilliance: Mixing Daisies with Diversity
Daisies, though stars of the show, flourish best in an ensemble cast. Introduce a variety of plant companions that complement their charm while infusing diversity into your lawn’s design.
Tall grasses, vibrant perennials, or even ornamental shrubs create a multi-dimensional tapestry where daisies take centre stage without monopolizing the spotlight.
Visual Pathways: A Guided Tour of Beauty
Now, let’s consider visual pathways – the guided tour your eyes take through your landscape. Strategically integrate daisies along these pathways, allowing them to enchant and surprise as you navigate your outdoor haven.
The controlled presence of daisies becomes a delightful discovery, enhancing the aesthetic journey.
Maintenance Mastery: Cultivating the Balance
Balancing controlled integration demands a touch of horticultural finesse. Regular maintenance involves deadheading spent daisy blossoms to prevent unchecked seed dispersal, ensuring your controlled integration doesn’t morph into a daisy domination.
Pruning and shaping your daisies also play a pivotal role in maintaining the desired aesthetic.
Common Daisy Lawn Control & Prevention Conclusion
And there you have it, fellow gardening enthusiasts, our exploration into the realm of daisy control and landscape mastery reaches its conclusion.
We’ve journeyed through the intricacies of identifying and combatting these persistent invaders, while also embracing eco-friendly approaches that align with the harmony of our natural surroundings.
Remember, gardening is an ongoing adventure, and your lawn is a canvas of endless possibilities.
By incorporating the insights gained here and infusing your own creative touch, you’ll be well on your way to cultivating a landscape that not only withstands daisy invasions but also flourishes with vitality and allure.
How To Easily Fix Patchy Grass and Bare Spots [2 Methods]
Welcome to our guide on how to easily fix patchy grass and bare spots.
Say goodbye to the vexing challenge of patchy grass – we’re diving headfirst into strategies, methods, and practical steps to breathe new life into those barren spots.
Let’s face it – patchy grass isn’t just an eyesore; it’s a signal that your lawn’s potential is untapped.
This guide is your roadmap to reviving and revitalising those lacklustre areas, restoring a harmonious and thriving landscape.
We’ll navigate the world of seed and sod, exploring techniques that suit your timeline and aspirations.
From the initial diagnosis to the final mow, every step is a deliberate stride towards a seamless, verdant expanse.
So, if you’re ready to roll up your sleeves, arm yourself with knowledge, and unveil the lush potential hidden beneath those patches, you’re in the right place.
Get ready to unlock the art of transforming patchy grass into a masterpiece. Let’s dive!
Why and When To Repair

Before you dive headfirst into your turf-transforming escapade, let’s demystify the why and when behind the grand task of repairing those pesky patches and bare spots.
Why Repair Your Patchy Lawn
Why bother, you ask? Well, consider your grassy expanse as a living, breathing entity – a dynamic tapestry of nature’s finest threads.
Those unsightly patches aren’t just an eyesore; they’re clues, signposts pointing to underlying issues that threaten your lawn’s vitality.
- Curb Appeal Makeover: Let’s face it – a patchy lawn isn’t exactly the pinnacle of aesthetic allure. Repairing bare spots and restoring uniformity isn’t just about vanity; it’s a transformative journey that enhances your property’s curb appeal.
- Healthier Ecosystem: Your lawn isn’t just a carpet of green; it’s a bustling ecosystem that hosts a microcosm of life. Those bare patches disrupt the delicate balance, leaving room for opportunistic weeds to strut their stuff. Repairing these gaps helps restore the ecological equilibrium, allowing beneficial organisms to flourish.
- Soil Symbiosis: Beneath the surface, a dance of roots and soil microbes plays out – a symphony of nutrient exchange and water retention. Bare spots upset this harmonious choreography, depriving neighbouring grass of the support network they need to thrive.
When To Repair Your Patchy Lawn
Now that you’re attuned to the why, let’s delve into the when. Timing is everything in the world of landscaping, and addressing patchy grass and bare spots is no exception.
- Spring Awakening: As the world awakens from its winter slumber, your lawn stirs to life too. Spring is the optimal time for repair, as grass plants are geared up for growth, ready to embrace fresh seed and nutrients. The moderate temperatures and increased sunlight create the ideal environment for speedy recovery.
- Autumn Revival: A second chance for lawn restoration is autumn. As temperatures begin to cool and moisture becomes more reliable, your grass rejoices in the perfect conditions for growth. Repairing during autumn primes your lawn for a spectacular springtime comeback.
- Not-So-Hot Summer: While summer is all about lazy days and barbecues, it’s not the best season for repairing bare spots. The scorching heat and potential drought stress make it a challenging time for grass to establish itself. However, if you’re in a cooler region, early summer might still be an option.
Patch Methods
Patching with seed

When it comes to breathing life back into those barren patches on your lawn, patching with seed is a time-honoured method that can make your grass dreams flourish.
Patching with seed isn’t just a practical solution; it’s a journey that allows you to witness the miracle of growth from the very beginning.
Here’s why you might opt for this method:
- Budget-Friendly: If your green ambitions are matched by a pocket-friendly approach, seeding is your best ally. It’s a cost-effective way to revive your lawn without emptying your wallet.
- Custom Creativity: Seed variety is the spice of turf life. With a range of grass species and blends available, you have the artistic license to choose the perfect seed type that complements your existing lawn.
- Small Patches, Big Impact: When you’re dealing with small to medium-sized bare spots, patching with seed shines. It’s like filling in the gaps of a puzzle, each seed a piece that contributes to the grand picture.
Here at Turfworld we off the perfect solution in two variations.
Patching with Turf

A method that involves introducing pre-grown grass sod into your lawn’s plot. It’s like transplanting a slice of lawn heaven to your bare spots, creating an instant makeover that can leave you wondering if it’s magic or horticultural prowess.
Why Choose Patching with Turf:
When time is of the essence and you’re looking for a speedy lawn facelift, turf patching takes center stage. Here’s why this method might be your top pick:
- Instant Gratification: With turf, there’s no waiting for seeds to sprout and grow. It’s a theatrical entrance, an immediate transformation that turns barren into beautiful with the snap of your fingers.
- Major Makeover Magic: If you’re dealing with larger patches or seeking a uniform look across your lawn, turf patching is the ultimate chameleon. It seamlessly integrates with your existing lawn, leaving no trace of its transplant journey.
- Beginner-Friendly: If you’re a novice in the world of lawn care, turf patching is your trusty sidekick. It requires less skill and guesswork compared to seeding, making it an ideal choice for those who are dipping their toes into the turf-taming waters.
Our TW1 Turf rolls here at Turfworld are the perfect solution. Click here for more details.
What You’ll Need
Equipment / Tools
- Garden Rake: Your go-to for removing debris and loosening the soil’s grip, setting the stage for your patching performance.
- Aerator: This contraption is like a breath of fresh air for your soil, punching holes to alleviate compaction and allow nutrients to flow freely.
- Spreader: A dependable sidekick for even seed or fertiliser distribution, ensuring your efforts aren’t concentrated in one spot like a spotlight gone rogue.
- Seed Spreader or Turf Cutter: Depending on your chosen patching method, a seed spreader or turf cutter becomes your artist’s brush, delicately placing seeds or turf squares onto the canvas.
- Wheelbarrow or Garden Cart: Your workhorse for hauling soil, compost, and other materials – a true companion when the going gets heavy.
- Sprinkler or Hose: Nature’s hydration heroes, delivering the life-giving elixir that propels your seeds or turf to glory.
- Lawn Mower: A mow-master that’ll trim your existing lawn to the ideal height before patching and keep it well-manicured post-revival.
- Lawn Roller: A gentle presser that ensures proper seed-to-soil contact or turf integration, like a friendly handshake sealing the deal.
- Gloves, Knee Pads, and Hat: Your personal armor against the elements and the rigors of patching – safety and comfort are paramount.
- Edging Tool: To carve clean lines around your patched areas, giving your lawn a professional finish that’s nothing short of picturesque.
Materials
- Grass Seed: The heart of your patching endeavour, choose a grass seed variety that suits your climate, soil type, and intended lawn use.
- Topsoil or Compost: A nutritious foundation for your seeds or turf, providing the essential nutrients and structure they need to thrive.
- Fertiliser: A gentle nutrient boost to kickstart growth and support your patches on their journey to lushness.
- Turf Sod: If you’ve opted for turf patching, turf sod becomes your instant green carpet, ready to roll onto your bare spots.
- Mulch: A protective cloak that shields your patches from the elements, conserves moisture, and encourages seed germination.
- Water: The elixir of life, your patches’ hydration hero. A steady supply of water is essential for seeds or turf to establish and flourish.
- Lawn Repair Mix: An all-in-one solution that often includes grass seed, fertiliser, and mulch – a convenient choice for streamlined patching.
- Markers or Flags: Tiny sentinels that stand guard over your patches, ensuring you remember where the magic is happening.
- Straw or Hay: A cosy blanket for your seed patches, helping retain moisture and prevent erosion.
- Lawn Dressing or Sand: A fine layer that can aid soil leveling, improve drainage, and create an ideal environment for seed germination.
How to Fix Patchy Grass and Bare Spots [Seed Method]
The seed method – a pocket-friendly and straightforward approach – beckons you to wield your green-thumb magic and transform those bare spots into flourishing oases.
Step 1: Rake The Area
Begin with a rousing garden rake session, sweeping away debris and the remnants of bygone grass.
While you’re at it, cast an eagle eye for signs of grub damage – if the grass peels up like a rug, it’s time to tackle the grub issue.
Step 2: Loosen the Soil
Invoke the power of a hard-toothed lawn rake or a trusty garden cultivator to break up the soil.
Should the soil appear compacted like a city sidewalk, consider calling in reinforcements – a core aeration tool.
A nifty gadget that paves the way for aeration holes, created with a satisfying push from your foot.
Step 3: Apply Compost
It’s compost’s time to shine – sprinkle a generous layer of compost or loamy soil, wielding the rake like a maestro’s baton to mingle these ingredients into the existing soil.
The rake’s flipside serves as a leveller, distributing the topdressing in harmonious waves.
Step 4: Add The Seeds
Enter the stars of the show – your chosen grass seeds. A sprinkle of potential, blanketing the patch in an even embrace.
Not too crowded, though – allow each seed its own moment in the spotlight.
Step 5: Rake and Roll
With a gentle rake, encourage the seeds to settle in, creating a union of soil and seed.
Some seeds will discreetly hide beneath a thin soil veil, keeping them snug and secure.
Step 6: Hydration/Watering
Start with a delicate sprinkling of water, ensuring the seeds’ cradle remains moist throughout the day.
In the sweltering embrace of hot weather, consider a shield of burlap to cast cooling shade over the patch, guarding against the seeds’ thirst.
Alternatively, let a whisper-thin layer of wheat straw play guardian, cradling the seeds in its embrace, preserving their moisture-rich sanctuary.
In the initial 10-day overture, your patch yearns for daily hydration – a rhythmic dance of watering to coax the seeds into their sprouting performance.
As they make their debut, shift to a two-day serenade, continuing for another month or so.
With maturity, your young grass finds its rhythm, welcoming a weekly curtain call for water.
Step 8: Mowing
Grant your patch the spotlight it deserves by letting its grass blades stretch slightly taller than the rest of your lawn.
Watch for the enchanting moment when the colour of your patch embraces the surrounding green in a seamless duet – that’s your cue.
Embrace a choreographic approach as you mow around the patch for a couple of mowing cycles. This strategic dance ensures your patch is seamlessly woven into the lawn’s tapestry.
Some experts recommend that you let your new grass flourish undisturbed for a gracious span of seven weeks before the blades of your mower make their debut.
How to Fix Patchy Grass and Bare Spots [Turf Method]
Time is of the essence, and those bare spots demand a swift makeover. Enter the turf patch method – a dynamic approach that lets you roll out a green carpet of instant transformation.
Ideal for multiple patches and those who crave rapid results, this method promises a seamless integration into your lawn’s lush tapestry.
Step 1: Cut a Turf Patch
Arm yourself with a sharp shovel or garden knife, poised to slice a patch of lush sod slightly larger than the bare expanse you intend to rejuvenate.
Your patch’s boundaries should extend about 2 inches beyond the edges of the bare spot.
Step 2: Remove The Old Turf
Position your sod patch snugly atop the bare canvas. With a keen-edged shovel or garden knife, delicately outline the perimeter of the turf.
This tracing act weaves your patch into the tapestry of healthy lawn, setting the stage for transformation.
Begin by carefully lifting the sod patch, unveiling the canvas beneath.
With the finesse of a hand cultivator, remove the remnants of the past – bid adieu to the deceased grass and the halo of healthy green encircling the bare expanse.
Ensure that your sod patch takes its place at the same level as the rest of the lawn, ready to shine in the spotlight of seamless integration.
Step 3: Soil Preparation
Time to loosen the soil’s grip – summon your shovel, garden rake, or cultivator to create a welcoming bed.
Loose soil acts as the red carpet for your sod patch’s root system, encouraging it to swiftly anchor itself.
Step 4: Plant The Turf Patch
Gently place the sod patch within the excavated area, ensuring a snug fit. Press it down firmly and repeatedly walk on the area to establish good contact with the soil.
Provide an immediate dousing of water to kickstart the integration process.
For the following several days, water the sod patch two to three times daily. This consistent moisture fosters a strong bond and encourages active growth.
Over the next two weeks, witness the magic unfold as your sod patch seamlessly blends with the rest of your lawn.
While this visual integration might occur relatively quickly, keep in mind that full root development can take up to six weeks.
During this transition, don’t be alarmed if your sod patch exhibits a slight colour variation.
This is a temporary phenomenon that will fade as the patch establishes itself.
Frequently Asked Questions
When is the best time to tackle patchy spots in my lawn?
For the seed method, aim for the gentle embrace of spring or the mellowness of early autumn. If you’re turfing your way to a luscious lawn, the cooler temperatures of these seasons also work like magic.
Can I simply throw grass seed on bare spots without any preparation?
While the image of a seed-spreading spectacle is delightful, a little groundwork ensures your seeds have a cosy home to germinate. Raking, soil loosening, and perhaps a touch of topdressing or compost – it’s like prepping the stage for a blockbuster show.
How much water do my new patches need?
Picture your patches as thirsty guests at a garden party – water them regularly, especially in their early days of growth. You’re looking at daily or even twice-daily watering until germination, followed by a more relaxed schedule as your new grass matures.
What’s the secret behind a seamless patch integration?
Allow your new grass to mature slightly longer than the surrounding lawn before you mow it down to the same height. Think of it as a symphony conductor ensuring every note is in perfect harmony.
Can I speed up the patch blending process?
Nature loves its rhythm, but a little extra care can nudge things along. Encourage your patches with ample water and gentle fertilisation.
Why does my patch look a bit different in colour?
Fear not, colour variations are the norm as your new grass finds its rhythm. This is temporary – just like a painter’s palette, your lawn will blend its hues in due time.
How long until I can revel in a fully restored lawn?
Within a few weeks, your patch should blend harmoniously. For the full-rooted magic, give it about six weeks or so. Remember, nature’s symphony takes time to reach its crescendo.
How to Fix Patchy Grass Conclusion
There you have it, a comprehensive guide to tackling the persistent issue of patchy grass.
We’ve journeyed through the strategies, methods, and essential steps that form the foundation of a thriving lawn makeover.
Embracing the challenge of patchy grass isn’t just about aesthetics – it’s about cultivating a healthier, more vibrant outdoor space.
By addressing those bare spots head-on, you’re breathing new life into your lawn and reclaiming its lush potential.
Whether you opt for the meticulous seed method or the rapid transformation of turf patching, the goal remains the same: to seamlessly integrate these patches into your existing carpet of green.
Armed with knowledge, tools, and determination, you’re poised to restore your lawn’s uniformity and beauty. Happy patching!
How To Seed a New Lawn
If you’re looking for information on how to seed a new lawn, you’ve come to the right place.
In this comprehensive guide, we will unravel the secrets of turning a barren expanse into a lush oasis.
From preparing the soil to nurturing the tender seedlings, we’ll walk you through each step of the process with expert guidance and insightful tips.
Whether you’re a first-time gardener or a seasoned green thumb, this complete guide on seeding a new lawn will equip you with the knowledge and tools to achieve remarkable results.
Let’s dive straight in.
Calculating Seed

Measuring the Lawn Area
To begin, let’s turn our attention to measuring the lawn area. After all, you can’t plan a successful seeding endeavour without knowing the expanse of your green canvas.
So grab your trusty measuring tape and let’s get started!
First, we need to define the boundaries of your lawn. Take a stroll around your property and identify the edges of where you want your grass to thrive.
Note any irregular shapes or areas that require special attention.
Measure the length and width of your lawn, ensuring you account for any protruding features like flower beds or walkways. Don’t forget those hard-to-reach corners; precision is key!
Now that you have these measurements in hand, it’s time to calculate the total lawn area. For a square or rectangular lawn, simply multiply the length by the width.
However, if your lawn has more complex contours, you may need to divide it into smaller sections and calculate each one separately. Add up the areas of these sections to obtain the grand total.
Here’s an image that shows you how to measure your lawn.
Calculate The Amount Of Grass Seed Needed
Multiply the total lawn area by the recommended seeding rate per square meter.
For example, if the seeding rate is 40 grams per square meter and your lawn area is 100 square meters, you would need 4 kilograms of grass seed (100 square meters x 40 grams/square meter = 4,000 grams or 4 kilograms).
How To Seed a New Lawn: Step-By-Step

Step 1: Preparing The Soil
Begin by examining the texture of the soil. Is it predominantly sandy, loamy, or clayey?
Sandy soil tends to drain quickly, while clayey soil retains water and may become compacted. Loamy soil strikes a balance, offering good drainage and water-holding capacity.
Next, consider the soil’s pH level. A pH test will reveal whether your soil is acidic, neutral, or alkaline.
Most grass species thrive in slightly acidic to neutral soil, with a pH range of 6.0 to 7.5. Adjustments may be necessary if your soil’s pH deviates significantly from the ideal range.
Before you sow the seeds, prepare the soil like a master sculptor preparing a canvas.
- Clear away any debris, rocks, or weeds that may hinder the seed’s journey to the welcoming earth.
- Smooth the surface with a gentle rake, creating a clean and receptive bed for your seeds to settle.
Step 2: Choose Your Sowing Method
It’s time to choose the sowing method that suits your needs and preferences.
You have two options: broadcasting or using a seed spreader.
Broadcasting involves spreading the seeds by hand, allowing them to gracefully disperse across the soil.
Alternatively, a seed spreader provides a more precise and even distribution, ensuring uniform coverage.
The choice is yours, for both methods can yield splendid results.
Step 3: Spread The Grass Seed
With your prepared seed or seed mixture in hand, it’s time to spread the magic across your prepared soil.
Use a seed spreader or hand-spreading techniques to evenly distribute the grass seed over the entire lawn area.
Take care to avoid clumps or bare patches, aiming for a uniform coverage that will result in a lush and consistent growth.
Tip: Double Pass
For meticulous gardeners who seek perfection, consider making a double pass when applying the seeds.
This technique involves sowing the seeds in one direction, then sowing again perpendicular to the initial pass.
By crisscrossing your steps, you ensure thorough and even coverage, leaving no room for patchy gaps or missed spots.
Step 4: Lightly Rake
Once the seeds have found their place, lightly rake the soil to ensure good seed-to-soil contact. This step aids in anchoring the seeds and enhancing germination.
Step 5: Roll With a Lawn Roller

Once you’ve diligently raked the grass seed into the prepared soil, it’s time to take the next step towards ensuring optimal seed-to-soil contact.
Enter the weighted roller, a trusty companion in the quest for a resilient and well-established lawn.
As you roll the weighted roller over the seeded area, a gentle yet firm pressure is applied, delicately pushing the grass seed into the welcoming embrace of the soil.
This crucial step not only helps secure the seeds in place but also minimises the risk of washout caused by watering or rainfall.
By maximising soil contact, we pave the way for successful germination and the birth of a vibrant, steadfast lawn.
Caring For a Newly Seeded Lawn
Irrigation Guidelines

Step 1: Watering Frequency and Duration
In the initial phase after seeding, it is essential to keep the soil consistently moist to support germination.
Watering should be frequent enough to prevent the soil from drying out, but not so excessive as to cause pooling or runoff.
Strive for a fine balance, dear reader, as too much water can drown the delicate seedlings, while too little can impede their growth.
Aim to water the newly seeded lawn two to three times a day for short durations. The goal is to keep the soil surface moist without saturating it excessively.
Consider using a gentle spray nozzle or a sprinkler with a fine mist setting to ensure even coverage and prevent soil displacement.
Step 2: Monitoring Moisture Levels
To gauge the moisture levels, perform a simple touch test. Gently press your finger into the soil, about an inch deep. If it feels moist, akin to a squeezed sponge, then the watering regimen is adequate.
However, if the soil feels dry, it is a signal that more frequent watering is required. On the other hand, if the soil feels overly saturated or waterlogged, reduce the watering frequency to avoid suffocating the delicate roots.
Step 3: Adjusting Irrigation as Seedlings Mature
As the seedlings begin to sprout and establish themselves, it is time to adjust the irrigation schedule.
Gradually reduce the frequency of watering while increasing the duration. This encourages the roots to grow deeper into the soil, promoting resilience and drought tolerance.
Transition to watering once a day, ensuring that the soil receives enough moisture to penetrate at least 4 to 6 inches deep. It is crucial to water deeply rather than lightly, as deep watering encourages the roots to reach down into the soil for water, making the lawn more resilient in the long run.
Step 4: Timing Is Everything
The timing of irrigation also plays a significant role in the health of your newly seeded lawn.
Watering in the early morning hours, between 6 a.m. and 10 a.m., allows the grass blades to dry before evening, reducing the risk of fungal diseases.
Avoid watering in the evening or at night, as prolonged moisture on the grass blades can create a favourable environment for disease development.
Mowing and Maintenance
To promote healthy growth and maintain an aesthetically pleasing lawn, it is essential to establish a regular mowing routine.
However, exercise patience and allow the new grass plants to establish themselves before the first cut, typically after a minimum of 21 days from germination.
When it comes to mowing, a golden rule emerges: never remove more than one-third of the grass blade’s length in a single mowing session.
This rule applies regardless of your desired lawn height. If you prefer a shorter lawn, stick to the one-third rule and consider mowing again a few days later to gradually achieve the desired height.
Nourishing your grass with adequate nutrition is crucial for its well-being. Selecting a suitable fertiliser is paramount.
It is prudent to opt for a granulated fertiliser that provides slow-release nourishment, preventing potential leaf scorching that can result from over-fertilisation.
Applying a good quality fertiliser once can sustain your lawn for up to 90 days, providing a steady supply of essential nutrients.
Regularly Inspecting for Disease or Pest Issues
Visual Inspection: The Eyes of Vigilance
Look for any signs of discoloration, wilting, or abnormal growth patterns. These visual cues may indicate the presence of diseases or pests that require your attention.
Diseases can manifest in various forms, each with its unique symptoms. Rust, for instance, reveals itself through orange or reddish-brown spots on the grass blades, resembling iron rust.
On the other hand, fungal diseases, such as dollar spot or brown patch, may present as circular patches of dead or discoloured grass.
By familiarising yourself with common lawn diseases and their characteristics, you can swiftly identify and address any issues that arise.
Pest Patrol: The Battle of Balance
Pests, come in all shapes and sizes, and they each have their own appetite for your precious turf.
From insects like grubs and chinch bugs to critters like moles or rabbits, these voracious creatures can leave your lawn vulnerable and damaged.
Keep a watchful eye for signs of pest activity, such as chewed grass blades, tunnels, or holes in the soil.
Identifying the specific pests troubling your lawn will enable you to choose the most effective control methods.
How To Seed a New Lawn Conclusion
By following the step-by-step process on how to seed a new lawn, you have gained the knowledge and confidence to embark on your own lawn seeding project.
From site preparation to sowing the seeds, you have acquired the skills necessary to create a strong foundation for a healthy and beautiful lawn.
As you witness the first tender shoots emerge from the soil, remember that the work has only just begun. Caring for a newly seeded lawn requires dedication and ongoing maintenance.
Regular irrigation, as outlined in the guidelines provided, will be crucial for promoting healthy growth and preventing stress.
The importance of avoiding overwatering or underwatering cannot be overstated, as both can have detrimental effects on your new lawn’s establishment.
Remember to be patient and diligent in your efforts, allowing nature to work its magic while providing the necessary care and attention.
With time, your newly seeded lawn will flourish, becoming a testament to your hard work and a source of pride and enjoyment for years to come.
How to Aerate a Lawn: The Ultimate Guide for Lush Green Turf
Is your lawn longing for a breath of fresh air? Does it seem tired, compacted, and in need of rejuvenation? In this guide, we’ll show you how to aerate a lawn.
Aeration, often dubbed as the “breath of life” for your lawn, is a crucial step in maintaining a healthy and vibrant turf.
By creating small pockets of space in the soil, aeration allows vital nutrients, water, and oxygen to penetrate deep into the grassroots, revitalising them from within.
Before you plunge into this exhilarating process, it’s important to understand the fundamentals.
From selecting the right equipment to mastering the proper techniques, we’ll leave no stone unturned as we equip you with the knowledge and expertise to become an aeration aficionado.
Let’s dive in!
Understanding Aeration: The Key to Lawn Vitality
What is Aeration?
Let’s start by demystifying the term “aeration.” Put simply, it’s the process of creating small holes in the soil to improve air circulation, water penetration, and nutrient absorption.
Over time, lawns can become compacted, which restricts the flow of vital elements to the grass roots. Aeration breaks up the compacted soil, allowing your lawn to breathe and thrive.
So why might your lawn need aeration? Well, heavy foot traffic, frequent mowing, and even the natural settling of soil can all contribute to soil compaction.
When the soil becomes compacted, it limits the movement of air, water, and nutrients, causing your grass to struggle.
By aerating your lawn, you provide a pathway for these essential elements to reach the roots, leading to improved growth and overall lawn health.
Benefits of Aeration
Now that we understand what aeration is, let’s explore the incredible benefits it brings to your lawn.
1. Enhances oxygen flow to the roots
First and foremost, aeration enhances oxygen flow to the roots. Just like humans, grass roots need oxygen to thrive.
By creating those tiny soil holes, you’re allowing oxygen to reach deeper into the soil, promoting healthy root development and ultimately resulting in a more resilient and vibrant lawn.
2. Improved Water Absorption
Another key benefit of aeration is improved water absorption. When your lawn is compacted, water tends to pool on the surface, leading to runoff and wasted irrigation.
By aerating, you break up the compacted soil, allowing water to penetrate deeper and be absorbed by the roots, where it’s needed most. This not only conserves water but also reduces the risk of shallow-rooted grass, making your lawn more drought-tolerant.
3. Enhances oxygen flow to the roots
But wait, there’s more! Aeration also optimises nutrient uptake. You may be diligently fertilising your lawn, but if the nutrients can’t reach the roots, they won’t do much good.
Aeration creates channels for fertilisers to penetrate the soil, delivering essential nutrients directly to the grass roots. This means your grass will be able to absorb and utilise those nutrients more effectively, resulting in healthier and lusher growth.
4. Helps Reduce Thatch Buildup
Lastly, aeration helps reduce thatch buildup. Thatch is a layer of dead organic matter that accumulates between the grass blades and the soil surface.
While a thin layer of thatch is beneficial, excessive buildup can hinder water penetration, promote disease, and create an unhealthy environment for your lawn.
Aeration breaks up this thatch layer, allowing it to decompose naturally and preventing potential problems down the road.
When to Aerate Your Lawn?
Timing is crucial when it comes to aerating your lawn, as it ensures maximum benefits and sets the stage for a healthy and thriving turf. Let’s explore the key factors to consider when determining the ideal time for aeration.
Seasonal Considerations
The timing of aeration depends on whether you have cool-season or warm-season grass. Cool-season grasses thrive in regions with moderate temperatures. For these grass types, the best time to aerate is during the early fall or spring.
These seasons provide optimal conditions for the grass to recover, establish strong roots, and prepare for the harsher conditions of winter or summer.
On the other hand, warm-season grasses flourish in warmer regions with hot summers. For these grass types, late spring or early summer is the recommended time for aeration.
This timing coincides with their peak growth period, allowing them to recover quickly and take full advantage of the aeration process.
Moisture Content
The moisture level of your soil plays a crucial role in the effectiveness of aeration. Before aerating your lawn, it’s essential to assess the moisture content to ensure optimal results.
To determine soil moisture, take a small sample of soil from your lawn and squeeze it gently in your hand. If it crumbles easily without feeling overly wet or dry, you’re in the ideal moisture range for aeration.
However, if the soil feels too dry and falls apart without holding its shape, consider watering your lawn a day or two before aerating.
On the other hand, if the soil feels excessively wet and forms a muddy ball, it’s best to wait until it dries out a bit before proceeding with aeration.
Growth Phase
It’s important to consider the growth phase of your grass when planning for aeration. Aeration should ideally be done during the active growth phase of your lawn.
This ensures that the grass can quickly recover and fill in any gaps or holes created during the aeration process.
Avoid aerating during periods of slow growth or dormancy, as the grass may struggle to recover and may not fully benefit from the aeration.
How do you know if your lawn needs aeration?
How do you know if your lawn needs aeration? Let’s dive into the signs and indicators that can help you determine if it’s time to give your turf some much-needed breathing space.
1. Compacted Soil
One of the primary reasons for aeration is soil compaction. Take a walk on your lawn and pay attention to how it feels underfoot.
Is it hard, dense, or resistant to penetration?
If so, chances are your soil has become compacted over time. Compacted soil restricts the movement of air, water, and nutrients, hindering the growth and health of your grass.
2. Poor Drainage
Does your lawn struggle to absorb water? If you notice puddles or areas where water tends to pool after rainfall or irrigation, it may indicate a drainage problem.
Compacted soil can prevent water from penetrating into the ground, resulting in surface runoff and water wastage.
Aeration helps break up the compacted soil, allowing water to seep through and reach the grassroots, promoting healthier growth.
3. Thatch Buildup
Thatch is a layer of dead organic matter that accumulates between the grass blades and the soil surface. While a thin layer of thatch is beneficial, excessive buildup can become problematic.
Take a close look at your lawn. If you notice a thick, spongy layer of thatch, it’s a signal that aeration may be necessary.
Aeration helps reduce thatch accumulation by creating channels for air, water, and beneficial microorganisms to break down the thatch naturally.
4. High-Traffic Areas
Areas of your lawn that experience heavy foot traffic, such as pathways, play areas, or sports fields, are prone to soil compaction.
Constant pressure and trampling can lead to compacted soil, causing grass to struggle and thin out. Keep an eye out for worn-out, bare patches in these high-traffic zones as they may benefit from aeration to rejuvenate the grass.
5. Dull and Unhealthy Appearance
If your lawn has lost its luster and appears lackluster, it might be a sign that it’s not receiving the essential elements it needs to thrive.
Compacted soil limits the availability of oxygen, water, and nutrients to the grass roots, resulting in a dull and unhealthy appearance.
Aeration helps invigorate your lawn by improving oxygen flow, enhancing water absorption, and promoting nutrient uptake, leading to a revitalised and vibrant turf.
By assessing these indicators, you can determine if your lawn is in need of aeration. If you notice any of these signs, it’s time to take action and give your grass the aeration it craves.
How To Aerate Your Lawn

Core Aeration
One of the most common and effective methods of lawn aeration is core aeration. This technique involves using a specialised machine or manual aerator to remove small soil cores from the ground.
These cores act as channels, allowing air, water, and nutrients to penetrate the soil more easily.
To perform core aeration, you’ll need an aerator machine or a hand-held manual aerator.
The machine typically has hollow tines that penetrate the soil and extract the cores, while a manual aerator consists of solid tines or spikes that create holes without removing soil plugs.
- Start by adjusting the depth setting on your aerator machine or positioning the spikes on your manual aerator to the desired depth. Generally, a depth of 2-3 inches is recommended.
- Then, walk slowly across your lawn, ensuring that the tines or spikes penetrate the soil at regular intervals.
- For optimal results, overlap each pass to ensure thorough aeration coverage.
Once you’ve completed the aeration process, don’t fret about the unsightly soil cores scattered across your lawn. Leave them be!
Over time, they will break down and become a natural part of the soil, contributing to its overall health.
Spike Aeration
If you don’t have access to a core aerator machine or prefer a simpler approach, spike aeration is a viable alternative.
Spike aeration involves using spiked shoes or a handheld aerator with solid tines to create holes in the soil without removing soil cores.
To perform spike aeration, simply strap on the spiked shoes or use the handheld aerator and walk across your lawn, ensuring even spacing between the holes. The spikes will create openings in the soil, facilitating air and water movement.
While spike aeration doesn’t provide the same level of soil compaction relief as core aeration, it can still be beneficial, especially for small lawns or maintenance between core aeration sessions.
Just be cautious not to overdo it, as excessive spike aeration can lead to further compaction around the holes.
Regardless of whether you choose core aeration or spike aeration, the key is to be thorough and consistent.
Adequate spacing between holes, typically around 2-4 inches apart, ensures proper coverage and maximum benefits for your lawn.
Post-Aeration Lawn Care Tips
Overseeding
After aeration, your lawn is primed for overseeding, which involves spreading new grass seed over the existing turf. Overseeding helps fill in thin or bare areas, promotes a denser lawn, and enhances the overall appearance of your yard.
Before overseeding, choose a high-quality grass seed that is compatible with your existing turf. Look for a seed blend that suits your climate and lawn conditions. Prepare the soil by gently raking the surface to loosen any debris and create a favorable environment for seed germination.
Next, evenly distribute the grass seed across your lawn using a spreader or by hand. Pay extra attention to areas with thin grass coverage or bare patches.
After seeding, lightly rake the soil to ensure good seed-to-soil contact. This helps the seeds establish root connections and encourages optimal growth.
To aid in seed germination, it’s crucial to keep the newly seeded areas consistently moist. Water lightly and frequently, ensuring the soil remains damp but not saturated. Depending on the weather conditions, you may need to water daily or even multiple times a day.
Be patient, as overseeding takes time, and with proper care, you’ll soon see new grass sprouting and filling in those bare spots.
Fertilisation and Watering
Post-aeration, your lawn will greatly benefit from proper fertilisation and watering.
Fertilising provides essential nutrients for healthy grass growth, while consistent watering ensures the newly aerated soil remains moist and supports root development.
Choose a high-quality, balanced fertiliser that is suitable for your grass type. Follow the manufacturer’s instructions for application rates and timing.
Ideally, apply the fertiliser a few weeks after aeration when the grass roots have had a chance to settle and establish.
As for watering, maintain a regular watering schedule to keep the soil consistently moist. Deep watering is preferred over frequent shallow watering as it encourages deeper root growth. Aim for around one inch of water per week, including rainfall.
Water early in the morning to minimise evaporation and allow the grass blades to dry before nightfall, reducing the risk of disease.
Regularly monitor the moisture levels of your lawn and adjust watering as needed. Remember, the goal is to maintain adequate moisture without creating waterlogged conditions.
Frequently Asked Questions
What is the best month to aerate my lawn?
The best month to aerate your lawn depends on the type of grass you have. For cool-season grasses, early autumn or spring is ideal.
For warm-season grasses, late spring or early summer is recommended. Timing is crucial to ensure optimal growth and recovery for your specific grass type.
Is it easy to aerate your own lawn?
Aerating your own lawn can be a manageable task, especially with the right tools and techniques. Manual aerators and rental aerator machines are available for DIY enthusiasts.
However, it’s important to consider factors like lawn size and your physical capabilities before taking on the task. If you have a larger lawn or limited time, hiring a professional landscaper can save you effort and ensure proper aeration.
Should I scarify or aerate my lawn first?
In most cases, it is best to aerate your lawn before scarifying. Aeration loosens the soil, improves airflow, and promotes healthy root growth.
By aerating first, you create an optimal environment for the scarifying process, which involves removing thatch and dead organic matter. Aerating prior to scarifying allows for better penetration and effectiveness of the scarifying equipment.
Is scarifying the same as aerating?
No, scarifying and aerating are not the same. While both processes are beneficial for lawn health, they serve different purposes. Aerating focuses on creating channels in the soil to improve airflow, water absorption, and nutrient uptake.
On the other hand, scarifying involves removing thatch, moss, and dead grass from the surface of the lawn. Both practices can be valuable, but they target different aspects of lawn care.
When should you not aerate your lawn?
There are a few situations when you should avoid aerating your lawn. If your lawn is newly established or recently sodded, it’s best to wait at least one year before aerating to allow the grass roots to establish firmly.
Additionally, if your soil is excessively dry or waterlogged, it’s advisable to wait for better soil conditions. Aerating when the soil is too dry can be challenging, while aerating waterlogged soil can lead to further compaction.
How To Aerate a Lawn Conclusion
Congratulations! You’ve now discovered the secrets to successfully aerating your lawn and ensuring its long-term vitality.
By understanding the importance of aeration, determining the right timing, employing the proper tools and techniques, and following up with post-aeration care, you’re well on your way to a lush and vibrant yard.
Remember, aeration is a valuable investment in your lawn’s health, providing improved oxygen flow, enhanced water absorption, optimised nutrient uptake, and reduced thatch build-up.
So, go ahead and give your lawn the attention it deserves. Embrace the transformative power of aeration, and watch your grass flourish like never before!
Stay tuned for more exciting landscaping and turf-growing tips in our future blog posts. Until then, happy aerating and happy gardening!
Conquering Leatherjackets: The Ultimate Guide to a Lush and Resilient Lawn
Leatherjackets! These seemingly innocent larvae possess the power to wreak havoc on your beloved turf, leaving homeowners and landscapers scratching their heads in disbelief.
These small, brownish-grey creatures may appear harmless, but their insatiable appetite for grassroots can turn your beautifully cultivated lawn into a tattered mess.
By unravelling the mysteries surrounding leatherjackets, we empower ourselves to take proactive steps in combating their devastating effects.
We have assembled an ultimate guide that will equip you with the knowledge and strategies to triumph over the leatherjacket menace.
In this comprehensive guide, we will explore their lifecycle, identify signs of infestation, and share effective prevention and control measures.
Furthermore, we will dive into treatment options, offering step-by-step instructions on using nematodes and insecticides to restore your lawn to its former glory.
Let’s begin this adventure and bid farewell to the leatherjacket woes once and for all.
What are Leatherjackets?

Leatherjackets – what they look like
Leatherjackets, mysterious and minuscule creatures that wreak havoc on lawns, are the larval stage of crane flies, also known as daddy longlegs.
These insects undergo a fascinating life cycle, emerging from eggs as tiny, wriggling larvae.
They dwell in the soil, where they feed voraciously on the tender grassroots of your turf, gradually growing in size and strength.
As they mature, they transform into pupae before eventually emerging as adult crane flies, completing their life cycle.
Leatherjacket Physical Appearance
Leatherjackets are intriguing creatures, bearing characteristics that set them apart from other pests in your lawn.
These plump larvae typically measure between 1 to 2 inches in length, sporting a cylindrical body with a smooth, shiny texture.
Their coloration ranges from pale grey to brown, blending seamlessly with the soil, making them all the more elusive.
Furthermore, their distinct lack of legs, which is quite the anomaly in the insect world, adds to their peculiar charm.
Leatherjacket Behaviour and Their Impact on Lawns
Beneath their unassuming appearance lies a destructive force that can wreak havoc on even the healthiest of lawns.
Leatherjackets have a ravenous appetite for grassroots, feeding on the very foundation that keeps your turf robust and resilient.
As they nibble away at the roots, your lawn becomes vulnerable to drought stress, nutrient deficiencies, and even complete turf loss.
Their feeding frenzy can leave unsightly patches, weakening the overall health and aesthetic appeal of your once-vibrant lawn.
Understanding the nature of these little critters is the first step towards protecting your turf and restoring its vitality.
Leatherjackets Lifecycle
The lifecycle of leatherjackets, those intriguing yet troublesome creatures that wreak havoc on our pristine lawns, is a fascinating journey filled with stages of transformation and survival.
- Egg Stage: It all begins when adult crane flies, commonly known as daddy longlegs, lay their eggs in the soil during the late summer or early autumn months. These small, cylindrical eggs are often clustered together and hidden within the grass or vegetation.
- Larval Stage: From these seemingly innocuous eggs, hatch the leatherjacket larvae, the primary culprits of lawn damage. These larvae have a slender, cylindrical body with a distinct leathery appearance, hence the name “leatherjacket.” They are typically greyish-brown in colour and can reach lengths of up to an inch.
- Feeding and Growth: During the larval stage, leatherjackets voraciously feed on the roots, stems, and leaves of grass, causing visible damage and weakening the overall structure of the turf. They continue to grow and develop, molting their skin several times as they progress through instars, or developmental stages.
- Pupation: After several months of feasting and growth, the fully-grown leatherjackets enter the pupal stage. They construct protective cases or cocoons in the soil, where they undergo metamorphosis, transforming into adult crane flies.
- Adult Stage: Finally, the pupae complete their transformation, and adult crane flies emerge from the soil. Unlike the leatherjacket larvae, adult crane flies do not cause direct damage to lawns. Instead, they focus on reproduction, seeking mates and perpetuating the lifecycle by laying eggs for the next generation.
Understanding the lifecycle of leatherjackets provides valuable insights into their behaviour, feeding patterns, and vulnerabilities.
By identifying the different stages, we can implement targeted control measures at the appropriate times, disrupting their life cycle and minimising their impact on our cherished lawns.
Signs of Leatherjacket Infestation

Sign of Leatherjackets – what to spot for
Visual Indicators Of a Leatherjacket Problem
When it comes to combating leatherjackets, early detection is key. Stay vigilant and keep a keen eye on your lawn for the following warning signs that could indicate a potential infestation.
Here’s what to look out for:
- Patches of Yellow / Brown Grass: Patches of grass that appear yellow or brown, as these could be the first visible indicators of leatherjacket activity.
- Birds: An increased presence of birds, such as starlings or gulls, in your lawn, could be a sign that they are feasting on leatherjackets lurking beneath the surface.
- Adult Crane Flies: One tell-tale sign is the presence of large numbers of adult crane flies hovering above your turf during their mating season.
The Damage Caused By Leatherjackets
The damage inflicted by leatherjackets is not limited to aesthetic concerns; their destructive behaviour can have a profound impact on the health of your lawn.
As these voracious larvae feed on the grassroots, your turf’s ability to absorb water and nutrients diminishes, leaving it vulnerable to stress and disease.
Areas affected by leatherjacket feeding may exhibit thinning grass, weakened root systems, and eventually, bare patches that disrupt the uniformity of your lawn.
Furthermore, the loss of healthy roots compromises your lawn’s resilience, making it more susceptible to other pests and environmental pressures.
Prevention and Control Measures
Natural Methods To Deter Leatherjackets
When it comes to battling leatherjackets, nature offers a range of strategies that can help deter these persistent pests without resorting to harsh chemicals.
Let’s explore some effective natural methods to keep leatherjackets at bay and safeguard the health of your turf.
Encouraging Beneficial Insects
Embrace nature’s allies by creating a welcoming environment for beneficial insects that feed on leatherjackets.
Predatory beetles, ground beetles, and parasitic wasps are known to be natural predators of these larvae.
To attract these helpful creatures, provide diverse plantings that offer nectar and pollen sources, such as flowering plants and herbs.
Additionally, avoid using broad-spectrum insecticides that can harm beneficial insects and disrupt the delicate balance of your ecosystem.
Promoting Healthy Soil And Lawn Maintenance
A strong and resilient lawn is more resistant to leatherjacket damage.
By focusing on soil health and proper lawn care practices, you can create an environment that discourages these pests from taking hold.
-
- Regular aeration: Aerating your lawn allows for better water and oxygen penetration, promoting robust root growth and making it more challenging for leatherjackets to thrive.
- Proper mowing: Maintain an appropriate mowing height, ensuring that your grass is neither too short nor too long. Longer grass can help deter egg-laying crane flies, while a healthy, dense turf discourages leatherjacket infestation.
- Adequate watering: Water your lawn deeply and infrequently, encouraging deep root growth. This helps establish a strong foundation and makes your turf less appealing to leatherjackets.
Implementing these natural methods can go a long way in preventing leatherjacket problems and maintaining a thriving lawn.
However, if the infestation becomes severe or persists despite your best efforts, it may be necessary to explore chemical options for more targeted control.
In our next section, we will delve into the use of nematodes and insecticides to combat leatherjackets effectively.
Chemical options for leatherjacket control
While natural methods can be effective in deterring leatherjackets, there are instances where chemical options become necessary to combat severe infestations.
Let’s explore some chemical measures that can aid in controlling these persistent pests and restoring the health of your turf.
Nematodes
Nematodes are microscopic roundworms that can be utilised as a biological control method for leatherjackets.
These beneficial organisms penetrate the larvae and release bacteria that cause disease, effectively eliminating the pests.
Applying nematodes to your lawn requires careful consideration of timing and soil conditions.
It’s crucial to follow the manufacturer’s instructions to ensure optimal effectiveness.
Insecticides
Insecticides can provide targeted control when other methods have proven insufficient.
When selecting an insecticide, opt for products specifically formulated for leatherjacket control and follow the recommended dosage and application instructions closely.
It’s essential to choose insecticides that have minimal impact on beneficial insects and the environment.
Remember to prioritise safety precautions, such as wearing protective clothing and avoiding application near water sources or flowering plants.
While chemical options can be effective, it’s important to exercise caution and use them judiciously.
Consider integrated pest management (IPM) practices, which combine various control methods to minimise the reliance on chemicals.
By integrating natural measures, proper lawn maintenance, and targeted chemical applications when necessary, you can strike a balance between effective leatherjacket control and environmental stewardship.
Treatment Options

Step-By-Step Guide For Using Nematodes
Harnessing the power of nematodes can be an effective and environmentally friendly way to combat leatherjackets.
Follow this step-by-step guide to properly apply nematodes and maximise their impact on your turf.
- Choose the right nematode species: Different nematode species target specific pests, so it’s crucial to select the right one for leatherjacket control. Seek out nematodes that are specifically formulated for this purpose, ensuring their efficacy in tackling the problem at hand.
- Determine the appropriate time for application: Timing is crucial when it comes to nematode application. Ideally, you should apply nematodes during the leatherjackets’ most vulnerable stage, which is typically in late summer or early autumn when the larvae are actively feeding near the soil surface. Follow the manufacturer’s instructions for the specific nematode product you are using to ensure proper timing.
- Prepare your turf for application: Before applying nematodes, ensure that your lawn is moist. Lightly water the area a day or two before the planned application to provide a suitable environment for the nematodes to move through the soil and reach the target larvae effectively.
- Mix nematodes with water: Follow the instructions provided by the nematode manufacturer to properly mix the nematodes with water. Typically, you will dilute the nematodes in a watering can or a sprayer according to the specified ratio.
- Apply nematodes to the affected areas: Pour the nematode solution evenly over the areas of your lawn that are infested with leatherjackets. Pay particular attention to the patches showing signs of damage or heavy leatherjacket activity. Ensure that the solution is distributed evenly to maximise coverage.
- Water your lawn after application: After applying nematodes, lightly water your lawn to help the nematodes penetrate the soil and reach the leatherjacket larvae. Moisture plays a vital role in the success of nematode treatment.
- Monitor and evaluate results: Regularly inspect your lawn following nematode application to assess the effectiveness of the treatment. It may take a few weeks for the nematodes to fully eliminate the leatherjacket population. Monitor the health and appearance of your turf, and be patient as the nematodes work their magic beneath the surface.
By following this step-by-step guide, you can utilise nematodes to combat leatherjackets and restore the health and beauty of your lawn.
Step-By-Step Guide For Applying Insecticides Effectively
When it comes to tackling a severe leatherjacket infestation, the judicious use of insecticides can provide targeted control.
Follow these guidelines to apply insecticides effectively and maximise their impact on your turf.
- Identify the appropriate insecticide: Not all insecticides are created equal, and selecting the right one for leatherjacket control is crucial. Look for insecticides specifically formulated for targeting these pests. Read the product labels carefully to ensure they are safe to use on your type of turf and follow the recommended dosage and application instructions.
- Timing is key: Apply insecticides at the most opportune time to achieve optimal results. Leatherjacket larvae are most active in late summer or early autumn, so timing your application to coincide with their peak activity increases the chances of successful control. Follow the instructions provided by the insecticide manufacturer to determine the best timing for your specific product.
- Prepare your equipment: Before applying insecticides, gather the necessary equipment. Ensure you have a calibrated sprayer or spreader appropriate for the size of your lawn. Clean and maintain your equipment to avoid clogging or uneven distribution, which can compromise the effectiveness of the treatment.
- Follow safety precautions: Prioritise safety when handling and applying insecticides. Wear protective clothing, including gloves, goggles, and a mask if required. Avoid exposure to the insecticide, and keep children and pets away from treated areas until the product has dried or as directed by the manufacturer.
- Apply insecticide evenly: Even distribution is crucial to ensure thorough coverage and maximise effectiveness. Calibrate your sprayer or spreader according to the manufacturer’s instructions to achieve the recommended application rate. Walk at a steady pace, maintaining a consistent speed to achieve a uniform application.
- Consider environmental impact: Minimise the environmental impact of insecticide use by following best practices. Avoid applying insecticides near water sources, such as ponds or streams, as they can pose a risk to aquatic life. Additionally, be mindful of neighbouring plants, including flowers and ornamentals, to prevent unintended damage.
- Monitor and evaluate results: After applying insecticides, monitor your lawn closely to assess the effectiveness of the treatment. Observe changes in leatherjacket activity and the overall health of your turf. Follow up with any necessary follow-up applications as recommended by the insecticide manufacturer.
Remember, insecticides should be used as a last resort when other methods have proven insufficient.
Restoring The Lawn

Repairing The Damage Caused By Leatherjackets
Leatherjacket infestations can wreak havoc on the appearance and health of your lawn, leaving behind unsightly patches and weakened turf.
Fear not, for there are steps you can take to restore your lawn and revive its former glory.
Let’s explore the process of repairing the damage caused by these pesky insects.
- Assess the extent of the damage: Begin by evaluating the severity of the leatherjacket damage in your lawn. Identify the areas that have been most affected, noting the extent of thinning, bare patches, and weakened grass.
- Rake and remove debris: Start the restoration process by gently raking the affected areas to remove any dead grass, thatch, or debris. This helps improve air circulation, allows new growth to emerge, and creates a clean slate for the next steps.
- Overseed bare patches: Overseeding is a crucial step in repairing the damage caused by leatherjackets. Select a high-quality grass seed suitable for your lawn’s conditions and choose a variety that is resilient and resistant to pests and diseases. Spread the seed evenly over the bare patches, following the recommended seeding rate provided by the manufacturer.
- Improve soil conditions: Leatherjacket damage often indicates underlying soil issues. To promote healthy regrowth, consider amending the soil with organic matter, such as compost or well-rotted manure. This improves soil structure, enhances nutrient availability, and aids in water retention.
- Water and nurture newly seeded areas: Proper watering is essential for the success of your lawn’s restoration. Keep the newly seeded areas consistently moist by watering lightly but frequently. Avoid overwatering, as this can lead to fungal diseases. Additionally, provide adequate nutrients through regular fertilisation to support the growth of new grass.
- Monitor and maintain: As your lawn begins to recover, monitor its progress closely. Keep an eye on the newly seeded areas, ensuring they receive sufficient water, sunlight, and nutrients. Conduct regular maintenance tasks, such as mowing at the appropriate height and addressing any weeds or pests that may emerge.
Restoring a lawn damaged by leatherjackets requires patience and diligent care.
By following these steps and providing the necessary attention, you can rejuvenate your turf and encourage healthy regrowth.
Tips For Reseeding And Overseeding The Affected Areas
Reseeding and overseeding are powerful techniques that can help revive the areas of your lawn that have been affected by leatherjacket damage.
In this section, we’ll explore some valuable tips to ensure successful reseeding and overseeding, allowing your turf to bounce back with vigour.
- Timing is crucial: Timing plays a vital role in reseeding and overseeding. It’s best to undertake these tasks during the optimal growing seasons for your specific grass type. Generally, early autumn or spring are favourable times, as the soil is still warm, and there’s ample moisture for seed germination.
- Prepare the soil: Before reseeding or overseeding, prepare the soil properly. Start by raking the affected areas to remove dead grass, thatch, and debris. Loosen the top layer of soil gently with a garden fork or aeration tool to improve seed-to-soil contact. This creates an ideal environment for germination and root development.
- Choose the right seed: Select high-quality grass seed that matches your existing turf or consider a blend that is resistant to pests and diseases. Choose a variety that thrives in your region’s climate and growing conditions. This ensures better compatibility and promotes a seamless integration with the rest of your lawn.
- Spread the seed evenly: Even distribution of the seed is key to achieving uniform growth and avoiding patchy areas. Use a handheld spreader or a mechanical seeder to ensure an even dispersal of the seed over the affected areas. Follow the recommended seeding rate provided by the seed manufacturer for optimal results.
- Keep the soil consistently moist: After reseeding or overseeding, it’s essential to keep the soil consistently moist to support seed germination and establishment. Water lightly and frequently, aiming to keep the top inch of soil consistently damp. Avoid excessive watering that can lead to pooling or runoff, which may wash away the newly applied seeds.
- Practice proper lawn care: While the newly seeded areas require special attention, it’s important to continue regular lawn care practices for the entire turf. Mow at the appropriate height, provide adequate nutrients through fertilisation, and address any weed or pest issues promptly. This holistic approach ensures the overall health and resilience of your lawn.
- Be patient and monitor progress: Reseeding and overseeding take time, and results may not be immediate. Exercise patience and closely monitor the progress of the newly seeded areas. Keep an eye out for signs of germination, such as the appearance of tiny grass blades. Adjust your watering and maintenance practices as needed to promote healthy growth.
By following these tips, you’ll increase the chances of successful reseeding and overseeding, rejuvenating the areas affected by leatherjacket damage.
Maintenance Practices To Ensure a Healthy, Leatherjacket-Resistant Lawn
To ensure long-term success and prevent future outbreaks, it’s crucial to implement ongoing maintenance practices that promote a healthy and leatherjacket-resistant turf.
In this section, we’ll explore essential tips and techniques to maintain your lawn’s vitality and ward off these persistent pests.
- Regular mowing: Maintaining the proper mowing height is paramount for a healthy lawn. Set your mower blades to the recommended height for your grass type and avoid cutting more than one-third of the grass blade at a time. Regular mowing helps strengthen the grass and discourages leatherjackets from laying their eggs close to the soil surface.
- Aeration: Aerating your lawn can significantly improve soil compaction and allow better water and nutrient absorption. Use a core aerator to create small holes in the turf, facilitating air circulation and root growth. This creates a more robust grass system that can better withstand leatherjacket damage.
- Proper watering: Watering your lawn deeply and infrequently is key to encourage deep root growth and make your turf less attractive to leatherjackets. Water your lawn in the early morning, aiming for about an inch of water per week, or adjust based on your specific grass and climate conditions. Avoid overwatering, as it can create a moist environment that appeals to leatherjackets and other pests.
- Fertilisation: Providing your lawn with balanced nutrition through regular fertilisation promotes healthy growth and helps fortify the grass against leatherjacket damage. Use a slow-release fertiliser with the appropriate nutrient balance for your grass type and follow recommended application rates. Avoid excessive nitrogen, as it can attract leatherjackets.
- Weed control: A weed-free lawn not only enhances its appearance but also eliminates potential hiding spots for leatherjacket larvae. Implement a proactive approach to weed control, including regular hand-weeding, herbicide application, or a combination of both. Be cautious when using herbicides, following the manufacturer’s instructions and considering their impact on beneficial insects and the environment.
- Proper drainage: Adequate drainage is essential to discourage leatherjackets from laying eggs in waterlogged areas. Ensure your lawn has proper drainage by addressing any standing water issues. Correct grading or consider installing drainage solutions such as French drains or catch basins to redirect excess water away from your turf.
- Regular soil testing: Periodic soil testing allows you to assess the nutrient levels and pH balance of your soil accurately. This information helps you make informed decisions regarding fertilisation and soil amendment, ensuring your lawn receives the necessary nutrients for optimal growth and resilience.
- Integrated Pest Management (IPM): Implementing an IPM approach can help manage leatherjacket populations effectively while minimising environmental impact. IPM combines various strategies such as biological controls, cultural practices, and targeted insecticides when necessary. This holistic approach aims to disrupt the leatherjacket life cycle and reduce their numbers without relying solely on chemicals.
By adopting these maintenance practices, you’ll create a robust and leatherjacket-resistant lawn.
Frequently Asked Questions
How do I know if I have leather jackets in my lawn?
Keep a keen eye on your turf and be on the lookout for patches of yellowing grass that seem weak and lacklustre.
Also, pay attention to any areas with uneven growth—it could be a tell-tale sign!
Another clue lies in the bare patches of soil where these voracious larvae have feasted on the roots of your precious grass.
Pro tip: if you spot birds like starlings eagerly pecking at your lawn, it’s a good indication that a leather jacket buffet is on offer.
What damage do leather jackets do to a lawn?
These voracious larvae have a knack for nibbling on grass roots, causing patches of yellowing, thinning, and uneven growth.
These persistent pests can attract birds like starlings, who delight in feasting on these delectable larvae, leading to even more destruction.
Do leatherjackets come back every year?
Leatherjackets, those sneaky larvae of crane flies, have a lifecycle that spans across seasons.
They hatch from eggs in late summer or early autumn, thrive in your lawn during the winter months, and eventually transform into adult crane flies in the spring.
Now, here’s the twist: leatherjackets themselves don’t come back year after year. They complete their life cycle and, once transformed, it’s the adult crane flies that make their appearance.
These crane flies then lay eggs, starting the cycle anew. So, while the leatherjackets don’t make a comeback, their offspring continue the tradition.
What time of year do leather jackets appear?
Leather jackets, those crafty larvae of crane flies, tend to make their grand entrance during specific times of the year.
These sneaky critters typically hatch from eggs in late summer or early autumn, just as the weather begins to cool down.
They thrive in the soil throughout the winter months, munching away on the roots of your beloved turf.
However, as spring rolls around and the weather starts to warm up, the leather jackets undergo their transformation, emerging as adult crane flies.
Can a lawn recover from leatherjackets?
While these voracious larvae can wreak havoc on your turf, the good news is that with proper care and intervention, your lawn can indeed recover from their damage.
The extent of the recovery depends on various factors, such as the severity of the infestation and the health of your grass prior to the attack.
Prompt action is key! By implementing effective control measures, such as using nematodes or insecticides, you can combat the leatherjackets and minimise their impact.
Will scarifying get rid of leatherjackets?
While scarifying, the process of raking or mechanically removing thatch and moss from your lawn, can indeed provide some benefits, it’s important to note that it is not a direct solution for eliminating leatherjackets.
Scarifying primarily focuses on improving the health and appearance of your turf by promoting better air circulation, reducing thatch build-up, and encouraging new growth.
However, leatherjackets reside below the surface of the soil, and scarifying alone may not effectively eliminate them.
To specifically target and control leatherjackets, it’s best to employ specialised methods such as nematodes or insecticides.
Leatherjackets Conclusion
In this comprehensive guide, we have explored the world of leatherjackets and the challenges they pose to your lush green turf.
From understanding their lifecycle and physical appearance to identifying the signs of infestation and implementing effective control measures, we have covered it all.
Early detection is crucial when dealing with leatherjacket infestations. Keep a close eye on your lawn for any signs of yellowing, thinning, or uneven growth.
Birds feeding on the lawn can also be an indicator of their presence. Once identified, you can take action to prevent further damage.
Thank you for joining me on this journey through the mysterious world of leatherjackets. I hope this guide has been informative, engaging, and inspiring.
Resources and Research Used For This Post