
How to Grow Grass on Shady Lawns [8 Expert Tips]
Are shady spots turning your lawn into a patchy mess? Say goodbye to the struggle! Welcome to our comprehensive guide on “How to Grow Grass on Shady Lawns.
Get ready to unlock the secrets of shade-tolerant grass varieties, practical tips for lawn care in low-light areas, and expert insights on transforming your once-dreary lawn into a verdant paradise. Say goodbye to those bald spots and hello to a vibrant, welcoming outdoor space.
Join us as we demystify the challenges of shade and reveal the steps to a picture-perfect lawn. Let’s get started!
The problem with shade
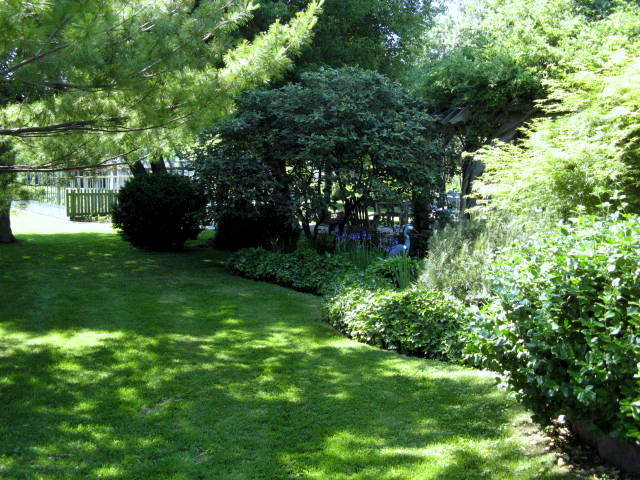
Shade can be a beautiful respite on a hot summer’s day, but when it comes to your lawn, it can pose some unique challenges. Here’s why:
- Lack of Sunlight: Grass, like all plants, thrives on sunlight. It’s the energy source for photosynthesis, the process that allows plants to convert light into energy. In shady areas, sunlight is limited, slowing down this vital process.
- Competition with Trees and Shrubs: Trees and shrubs not only create shade but also compete with grass for nutrients and water. Their roots can be aggressive, making it harder for grass to establish itself.
- Moisture Retention: Shade often leads to higher moisture levels in the soil. While this might sound beneficial, excessive moisture can encourage moss and fungi to take over, further inhibiting grass growth.
- Thinning Grass: Inadequate sunlight and competition often result in thin or patchy grass in shaded areas. This not only looks unattractive but also leaves the soil vulnerable to erosion.
- Choosing the Wrong Grass: Sometimes, the issue begins with selecting the wrong grass variety for your shady lawn. Not all grasses can thrive in low-light conditions.
However, the good news is that while shade presents challenges, it’s not an insurmountable obstacle. With the right strategies and knowledge, you can cultivate a healthy and beautiful lawn even in shaded areas.
How to Grow Grass on Shady Lawns

Tip #1: Remove Moss
Moss is a common issue in shaded lawns, and while it can be charming in the right setting, it’s not so friendly when you’re trying to grow lush grass. Here’s how to deal with moss:
1. Understand Moss: Moss loves shade and thrives in damp conditions. It often takes over in areas where grass struggles due to insufficient sunlight.
2. Rake It Away: Start by gently raking the moss. This helps loosen it from the soil and allows air and sunlight to reach the grass below.
3. Apply Moss Killer: If the moss problem is severe, consider using a moss killer or moss control product. Follow the product instructions carefully, and be mindful of any environmental concerns.
4. Aerate the Soil: Aerating the soil can help improve drainage and reduce excess moisture, making the environment less favourable for moss.
5. Adjust Soil pH: Moss often grows in acidic soil. Testing your soil’s pH and adjusting it, if necessary, with lime can discourage moss growth.
6. Reseed and Fertilise: Once you’ve removed the moss, it’s time to reseed the area with shade-tolerant grass varieties. These varieties are more resilient in low-light conditions. Follow up with a balanced fertiliser to kickstart grass growth.
7. Improve Sunlight: If possible, trim back branches or foliage that’s contributing to excessive shade. Even a little more sunlight can make a big difference in the fight against moss.
8. Regular Maintenance: Maintaining a healthy lawn with proper watering, mowing, and fertilising will help prevent moss from returning.
Remember, moss isn’t just a symptom of shade; it’s often a sign of an underlying issue with your lawn.
By addressing these concerns and taking steps to encourage healthy grass growth, you can say goodbye to moss and hello to a beautiful, green lawn.
Tip #2: Laying The Lawn – Timing
Timing is a critical factor when it comes to establishing a lush lawn in shaded areas. For shaded lawns, early Autumn or early spring are the ideal seasons to lay your grass.
During these periods, the weather conditions are just right. Mild temperatures provide a comfortable environment for grass seed germination, and there’s typically more moisture in the soil. This combination creates an optimal setting for your grass to take root and flourish.
Summer, on the other hand, is best avoided. The intense heat of summer can stress newly planted grass, especially in areas with limited sunlight. Additionally, summer often brings inconsistent rainfall, making it challenging to keep the soil consistently moist, a crucial factor for successful grass establishment.
To pinpoint the perfect timing for your specific location, keep an eye on soil temperatures. Grass seed typically germinates best when the soil temperature ranges between 50-65°F (10-18°C). A soil thermometer can be a handy tool for determining the right moment to begin your lawn project.
In the end, laying your lawn at the correct time is like setting the stage for a successful performance. By choosing early autumn or early spring, you’re providing your grass with the best opportunity to thrive in the shade.
Tip #3: Increase Natural Light in the Shaded Garden
When it comes to shady lawns, more natural light can make a world of difference. Here’s how to invite sunshine into your shaded garden:
1. Tree Trimming: If you have overhanging branches or tall trees casting excessive shade, consider strategically trimming them. Pruning can create pockets of sunlight, allowing your grass to thrive.
2. Selective Plant Removal: Evaluate the plants in your garden. Are there dense shrubs or groundcovers that are contributing to shade? Sometimes, removing or thinning out certain plants can let more light reach the lawn.
3. Choose Light-Coloured Materials: Opt for light-coloured garden furniture, pavers, or other hardscape elements. These surfaces reflect light, brightening up the area.
4. Mirrors and Reflective Surfaces: Mirrors strategically placed in shaded spots can bounce natural light around, effectively brightening up dark corners.
5. Shade-Tolerant Plants: Consider planting shade-tolerant groundcovers or ornamental grasses in areas where it’s challenging to grow a traditional lawn. These plants can thrive in lower light conditions.
6. Landscape Design: Think about the layout of your garden. Creating open pathways or open spaces can enhance light penetration. It’s all about optimising your garden’s design for natural light.
7. Prune with Purpose: Regularly prune and shape your existing trees and shrubs. This can help create dappled shade instead of heavy, continuous shade.
8. Use Light-Reflective Mulch: Choosing light-coloured mulch can have a surprising impact on light reflection in your garden.
Increasing natural light in your shaded garden not only benefits your grass but also makes the whole space more inviting.
By strategically managing the elements that contribute to shade, you’re creating an environment where your grass can thrive.
Tip #4: Add compost
One of the best ways to enhance the health of your grass in shaded lawns is by adding compost. Here’s why it’s a game-changer:
1. Boosts Soil Health: Compost is a rich source of organic matter. When you incorporate it into your soil, it improves soil structure, enhances nutrient retention, and increases beneficial microbial activity. All of these factors are vital for healthy grass growth.
2. Enhances Drainage: Shaded lawns often face moisture-related challenges. Compost acts like a sponge, improving soil drainage. This means excess water is less likely to pool around the roots, reducing the risk of waterlogged soil.
3. Provides Nutrients: Compost contains essential nutrients that your grass needs to thrive, including nitrogen, phosphorus, and potassium. It’s a natural and slow-release source of nutrition, promoting steady and sustained growth.
4. Soil Aeration: The organic matter in compost creates air pockets in the soil, improving aeration. This allows grass roots to breathe and access vital oxygen.
5. Reduces Compaction: Over time, shaded lawns can become compacted due to foot traffic or heavy rainfall. Compost loosens the soil, making it easier for grass roots to penetrate and access nutrients and moisture.
6. pH Balance: Compost has the ability to buffer soil pH, making it more suitable for grass growth. It helps maintain a neutral to slightly acidic pH range, which is ideal for most grass varieties.
To incorporate compost effectively, simply spread a layer of compost evenly over the shaded area of your lawn. You can use a compost spreader or apply it by hand. Aim for a thickness of around 1/4 to 1/2 inch. Afterward, gently rake the compost to ensure even distribution.
For existing lawns, consider topdressing with compost in early spring or early autumn. If you’re establishing a new lawn, work the compost into the soil before seeding or laying sod.
Adding compost is like giving your grass a nutrient-rich boost, helping it overcome the challenges of shade. It’s a natural, eco-friendly solution that enhances the overall health and resilience of your lawn.
Tip #5: Soil Preparation For Growing Grass in Shaded Areas
Before you start sowing seeds or laying sod in your shaded lawn, it’s crucial to ensure the soil is primed for success. Here’s how to get your soil ready:
1. Clear Debris: Begin by removing any debris, such as fallen leaves, sticks, or rocks. A clean slate is essential for effective soil preparation.
2. Test Soil pH: Shaded areas can sometimes have more acidic soil. Use a pH testing kit to check your soil’s acidity level. Most grasses prefer a slightly acidic to neutral pH (around 6 to 7). If needed, adjust the pH with lime to create a grass-friendly environment.
3. Loosen Compacted Soil: Shaded lawns are more prone to soil compaction, which restricts root growth and water infiltration. Use a garden fork or aeration tool to loosen the soil gently. This improves aeration and drainage.
4. Add Organic Matter: Incorporate organic matter like compost or well-rotted manure into the soil. This step is crucial, especially in shaded areas, as it enhances soil structure, nutrient content, and moisture retention. Spread a layer of compost and work it into the soil to a depth of about 3-4 inches.
Tip #6: Aerate
Aeration is a vital step in growing healthy grass, especially in shaded areas. Here’s why it’s crucial and how to go about it:
1. The Importance of Aeration: Shady lawns often suffer from soil compaction due to limited sunlight and root growth. Compacted soil restricts the movement of air, water, and nutrients, making it challenging for grass to thrive. Aeration helps alleviate this problem.
2. Timing Matters: Plan to aerate your lawn during its peak growing season. For cool-season grasses common in shady areas, early autumn is an excellent time. The grass is actively growing, and the soil is usually moist.
3. Choose the Right Aerator: There are two main types of aerators: spike aerators and core aerators. Core aerators, which remove plugs of soil, are typically more effective for addressing compaction.
4. Prep the Lawn: Before aerating, ensure the soil is moist but not waterlogged. If the soil is too dry, it may be challenging to aerate effectively. If it’s too wet, you risk causing more compaction.
5. Aeration Process: Start by running the aerator over the lawn in a pattern that covers the entire area. Overlap each pass slightly to ensure even aeration. The machine will remove small soil plugs, creating holes in the lawn.
6. Leave the Plugs: Don’t be alarmed by the plugs of soil left on the lawn’s surface; they will break down and return valuable nutrients to the soil.
7. Follow-Up Care: After aeration, it’s an excellent time to overseed your lawn with shade-tolerant grass varieties. The newly created holes provide an ideal environment for seed-to-soil contact.
8. Water and Fertilise: Water your lawn thoroughly after aeration to help the grass recover. It’s also a good time to apply a balanced fertiliser to support growth.
Aerating your shaded lawn allows oxygen, water, and nutrients to penetrate the soil more effectively, promoting root growth and overall grass health. It’s a simple yet highly effective practice that can make a significant difference in your lawn’s vitality.
By integrating aeration into your lawn care routine, you’re giving your shaded grass the best chance to thrive, even in less-than-ideal conditions.
Tip #7: Lawn Maintenance – [Cutting and Frequency]
Maintaining the right cutting height and frequency is essential for the health of your grass in shaded areas. Here’s how to do it effectively:
1. Optimal Cutting Height: For shaded lawns, it’s best to keep your grass slightly taller than you might for a sunny lawn. Aim for a cutting height of around 3 to 4 inches. Taller grass blades can capture more sunlight and perform better in lower light conditions.
2. Avoid Scalping: Never cut more than one-third of the grass height in a single mowing. Scalping, or cutting too much at once, can stress the grass and reduce its ability to photosynthesise effectively.
3. Regular Mowing: Stick to a consistent mowing schedule. In the growing season, mow your lawn about once a week. During periods of slower growth, you can reduce the frequency, but never remove more than one-third of the grass height.
4. Sharp Blades: Ensure your mower blades are sharp. Dull blades can tear grass rather than making clean cuts, leading to a brownish appearance and increased susceptibility to diseases.
5. Grass Clippings: Leave grass clippings on the lawn whenever possible. They act as natural mulch, returning nutrients to the soil. However, if the grass is exceptionally tall, consider collecting clippings to prevent smothering.
6. Adjust for Shade Intensity: If your shaded area varies in terms of light intensity (e.g., dappled shade to deep shade), consider adjusting the cutting height accordingly. Grass under deeper shade may benefit from a slightly taller cut.
7. Be Mindful of Weather: Avoid mowing wet grass, as it can lead to uneven cuts and compacted soil. Wait until the lawn is dry for a cleaner cut.
Proper lawn maintenance in shaded areas not only promotes healthy grass growth but also contributes to a more aesthetically pleasing and enjoyable outdoor space.
By adjusting your cutting height and frequency to suit the unique conditions of your shady lawn, you’re setting the stage for a green, thriving oasis.
Tip #8: Add Lawn Granular Fertiliser
Fertilisation is a crucial component of maintaining healthy grass in shaded lawns. Here’s why lawn granular fertiliser is a game-changer and how to use it effectively:
1. Nutrient Boost: Shaded lawns often struggle to receive an adequate amount of sunlight for photosynthesis. As a result, they may require extra nutrients to compensate for reduced energy production. Lawn granular fertiliser provides these essential nutrients.
2. Slow-Release Formulation: Opt for a granular fertiliser with a slow-release formulation. This type of fertiliser gradually releases nutrients over time, ensuring a steady supply for your grass without the risk of excessive growth or nutrient runoff.
3. Balanced NPK Ratio: Look for a fertiliser with a balanced NPK ratio. NPK stands for nitrogen, phosphorus, and potassium, the three primary nutrients needed for healthy grass growth. A balanced ratio like 10-10-10 or 14-14-14 provides well-rounded nutrition.
4. Application Timing: Apply fertiliser in the early spring or late fall when your grass is actively growing. Avoid fertilising during the hot summer months, as it can stress the grass in shaded areas.
5. Proper Spreading: Use a broadcast spreader to evenly distribute the granular fertiliser over your lawn. Be sure to follow the manufacturer’s recommended application rate for your specific fertiliser.
6. Watering In: After spreading the granular fertiliser, water your lawn thoroughly. This helps activate the fertiliser and ensures the nutrients reach the grass roots.
7. Avoid Over-Fertilisation: More is not always better. Over-fertilising can lead to excessive growth and potential nutrient runoff, which can harm the environment. Stick to the recommended application rates.
8. Monitor and Adjust: Pay attention to your grass’s response to the fertiliser. If you notice signs of over-fertilisation (e.g., excessive growth, thatch build-up), consider reducing the frequency or amount of fertiliser applied.
Lawn granular fertiliser is like a nutritional boost for your shaded grass, providing the nutrients it needs to thrive in less-than-ideal lighting conditions.
With the right formulation, proper timing, and careful application, you can support healthy grass growth and maintain a vibrant lawn.
Frequently Asked Questions
How do I know if my lawn is too shady for grass to grow?
Assess the amount of sunlight your lawn receives throughout the day. If it’s less than four hours of direct sunlight, it may be too shady for traditional turf grass. Consider alternative landscaping options or shade-loving groundcovers.
What’s the best way to improve soil quality in a shaded lawn?
To enhance soil quality, add organic matter like compost and consider aeration to alleviate compaction. You can also perform a soil test to determine if any specific nutrient deficiencies need to be addressed.
Can I grow grass under trees?
Yes, you can grow grass under trees, but it can be challenging due to competition for sunlight and nutrients. Select shade-tolerant grass varieties, and be prepared for some maintenance, such as regular leaf removal.
How often should I water a shaded lawn?
Shaded lawns generally require less water than sunny ones. Water deeply but less frequently to prevent overwatering, which can lead to fungal issues. Monitor the soil moisture to determine when to water.
How to Grow Grass on Shady Lawns Conclusion
In the world of landscaping, shaded lawns present unique challenges and opportunities. They may require a bit more care and attention, but the end result—a thriving, green lawn in the shade—is well worth the effort.
Remember, the key to success lies in choosing the right shade-tolerant grass varieties, addressing soil health, and implementing proper maintenance practices.
By adjusting your mowing height, protecting your grass from heavy foot traffic, and strategically designing your garden, you can create a shaded oasis that’s both visually appealing and functional.
Fertilising with slow-release granular fertiliser and being patient with your lawn’s growth process will yield excellent results over time.
So, whether your shaded lawn is a cosy backyard retreat or a hidden garden beneath the trees, embrace the beauty and tranquillity it offers.
With the insights you’ve gained, you’re well-equipped to nurture your green haven in the shade.
